Side Dishes
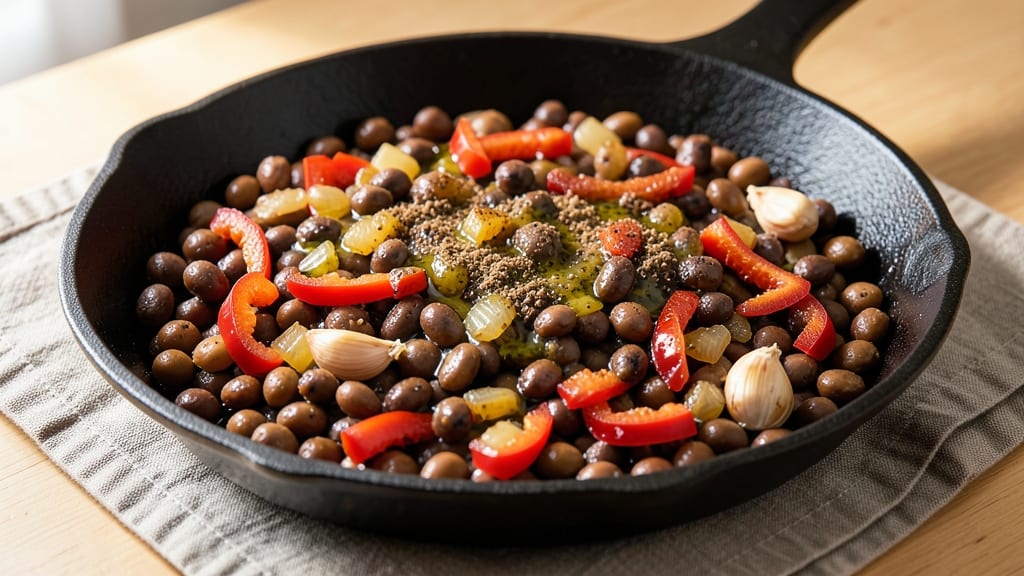
This canned black-eyed beans recipe transforms pantry staples into a smoky, spiced side dish that’s ready in just 15 minutes—no soaking or long simmering required. The secret lies in balancing earthy spices with a touch of smokiness, creating a dish that’s bold yet approachable.
I developed this recipe after realizing how often canned beans get overlooked for their dried counterparts, even though they’re just as versatile when seasoned properly.
The preparation is straightforward: drain and rinse the beans to remove excess sodium, then sauté onions, garlic, and bell peppers until soft. A blend of cumin, smoked paprika, and a splash of vinegar infuses the beans with deep, aromatic flavors while keeping the texture tender.
This method ensures every bite delivers a harmonious mix of smokiness and warmth without requiring specialized ingredients.
By the time you plate it, you’ll have a dish that’s rich in flavor but light enough to pair with rice, tortillas, or grilled proteins. The spices cling to the beans, creating a satisfying bite that’s both hearty and refreshing.
Garnish with fresh cilantro and a squeeze of lime for brightness, and you’ve got a side that elevates any meal—whether it’s a weeknight dinner or a weekend spread.
Perfect for meal prep or serving immediately, this recipe proves that canned beans can be just as impressive as their dried counterparts. The key is in the seasoning, and once you master it, you’ll never reach for canned beans without thinking of this spiced and smoky transformation.
Ingredients for canned black eyed beans
Pantry staples meet bold flavors in this smoky black-eyed bean transformation.
| Ingredient | Amount | Notes |
|---|---|---|
| Canned Black-Eyed Peas 🌱 | 2 cans | 15 oz each, low-sodium preferred |
| Yellow Onion 🧅 | 1 whole | Medium size, finely diced |
| Garlic Cloves 🧄 | 3 cloves | Fresh, minced for aromatic depth |
| Red Bell Pepper 🍆 | 1 whole | Medium size, diced into 1/4-inch pieces |
| Extra-Virgin Olive Oil 🫒 | 2 tbsp | High-quality for sautéing |
| Ground Cumin 🌿 | 1 tsp | Toasted for enhanced aroma |
| Smoked Paprika 🌶️ | 1 tsp | For authentic smoky flavor |
| Apple Cider Vinegar 🍏 | 1 tbsp | For brightness and tang |
| Fresh Cilantro 🌿 | ¼ cup | Chopped for garnish, stems removed |
| Fresh Lime 🍋 | 1 whole | Juiced for acidity balance |
| Sea Salt 🧂 | ½ tsp | Diamond Crystal preferred |
| Black Pepper 🌶️ | ¼ tsp | Freshly cracked for heat |
| Vegetable Broth 💧 | ½ cup | Low-sodium for seasoning |
The foundation starts with low-sodium canned black-eyed peas—Trader Joe's or Whole Foods brands excel here, offering consistent texture and reduced sodium content. For the onions and bell pepper, local farmers markets often provide fresher produce with more vibrant color and crunch. Garlic should be firm and unspotted, with a pungent aroma when peeled. The extra-virgin olive oil matters here: California Avocado Ranch or Colavita deliver the peppery notes that elevate the dish. Toast your cumin seeds briefly in a dry pan before grinding for a deeper, nuttier flavor—Penzeys Spices carries pre-toasted varieties if you prefer convenience.
No smoked paprika? Substitute with a mix of regular paprika and a pinch of liquid smoke—start with 1/4 tsp liquid smoke and adjust to taste. Fresh cilantro unavailable? Dried cilantro or parsley at half the amount works in a pinch, though the flavor won't be identical. The apple cider vinegar can be swapped for red wine vinegar or lemon juice, though the apple notes add subtle complexity. For a quicker prep, pre-chopped frozen bell peppers (no added salt) save time without sacrificing texture. The vegetable broth can be omitted entirely if you're using a well-seasoned vinegar, but it adds an extra layer of umami.
Store leftovers in an airtight container with a thin layer of olive oil on top to preserve freshness for up to 5 days in the refrigerator. For longer storage, portion into freezer-safe containers and freeze for up to 3 months. Reheat gently on the stove with a splash of water to restore moisture. This dish reheats beautifully, with flavors deepening as the spices meld further. Garnish with extra cilantro and lime zest just before serving to maintain brightness—the acidity cuts through the smokiness perfectly.
Why You'll Love This Recipe
- Pantry-to-Plate Speed: I swear by this recipe when I’m staring at an empty fridge at 6:30 PM. Sauté onion, garlic, and bell pepper in olive oil—takes five minutes—then dump in the drained beans, a splash of broth, and simmer. No soaking, no waiting, just done.
- Smoky-Sweet Magic: That roasted red bell pepper? It’s the secret weapon. Sear the strips until charred, then toss them in—suddenly you’ve got this deep, caramelized sweetness cutting through the beans’ earthiness. Honestly, the first time I did this, my roommate asked if I’d made a whole new dish.
- Leftover Reinvention: Make a double batch and you’ve got lunch sorted. Cold beans? Toss with lime and cilantro for a zesty bowl. Warm them up with rice and a fried egg—suddenly it’s breakfast for dinner. My freezer’s full of these beans because they’re that adaptable.
- Budget Meal, Big Flavor: Black-eyed peas are my go-to for stretching meals without skimping on taste. A can costs pennies, but the garlic and olive oil make it feel fancy. Between us, this is how I feed my book club on a teacher’s salary—no one ever guesses it’s this cheap.
Step-by-step instructions for spiced and smoky canned black-eyed peas
Here's how to transform simple canned black-eyed peas into a vibrant, aromatic dish with bold flavors.
Sauté the Aromatic Vegetables
Heat the 2 tablespoons extra-virgin olive oil in a medium skillet over medium heat. Add the finely diced yellow onion and cook for 3-4 minutes until softened and translucent. The onions should release their natural moisture and begin to caramelize slightly at the edges.
Add the 3 minced garlic cloves and cook for an additional 30 seconds until fragrant. The garlic should release its aroma but not brown—this prevents bitterness. Immediately add the diced red bell pepper and cook for 3-4 minutes until tender. You'll see the peppers soften and release their juices, creating a colorful base for your dish.
Season and Toast the Spices
Reduce the heat to medium-low and stir in the 1 teaspoon ground cumin and 1 teaspoon smoked paprika. Cook for 1 minute until the spices are fragrant and the cumin begins to darken slightly. This step develops the spices' full flavor potential through gentle toasting.
Add the 0.5 teaspoon sea salt and 0.25 teaspoon black pepper, stirring to distribute evenly. The spices should now coat the vegetables uniformly. Pour in the 0.5 cup vegetable broth and scrape up any browned bits from the bottom of the pan. These flavorful bits, called fond, are essential for building depth in your dish.
Simmer the Black-Eyed Peas
Drain and rinse the 2 cans black-eyed peas to remove excess sodium, then add them to the skillet. Stir gently to combine with the sautéed vegetables and spices. Bring the mixture to a gentle simmer over medium heat, then reduce to low heat and cook for 5-6 minutes until heated through.
Add the 1 tablespoon apple cider vinegar and stir. The vinegar will brighten the flavors and cut through any richness from the olive oil. Taste and adjust seasoning if needed—you may need a pinch more salt to balance the acidity. The peas should be tender but still hold their shape, with a glossy sheen from the simmering liquid.
Finish and Garnish
Remove the skillet from heat and stir in the juice of the whole fresh lime. The acidity will enhance the smoky flavors and add freshness. Let the mixture sit for 2-3 minutes to allow the lime juice to fully integrate.
Transfer the black-eyed peas to a serving bowl and garnish with the 0.25 cup chopped fresh cilantro. The cilantro adds a bright, herbal contrast to the smoky, spiced peas. Serve immediately while warm, as the flavors continue to develop off the heat. This dish pairs beautifully with grilled meats, warm tortillas, or crusty bread.
Pro Tips For Making Canned Black Eyed Beans
- SAUTÉ ONIONS LOW AND SLOW: I learned this the hard way—drowning onions in oil and blistering them turns your dish into a bitter, charred mess. Instead, keep the heat at a steady medium and let them cook for 8-10 minutes until they’re soft and translucent, not golden. That’s when their sweetness actually comes through.
- DRAIN AND RINSE THE PEAS: Canned black-eyed peas come packed in saltwater or syrup, and that extra liquid dulls the flavors. Drain them well, then give them a quick rinse under cold water to cut through any residual brine or sweetness. Trust me, your dish will taste fresher and brighter.
- CHAR THE GARLIC JUST BEFORE SERVING: If you cook the garlic with the onions, it’ll turn to bitter sludge before the rest of the dish is ready. Instead, add the minced garlic to the pan in the last 30 seconds of cooking—just enough time to smell that glorious aroma without burning it.
- USE THE PEPPER SEEDS TOO: I skip this when I’m lazy, but the dish is noticeably better when I don’t. After seeding and dicing the red bell pepper, save those little seeds and toss them into the pan with the other veggies. They add a subtle depth of flavor that most people overlook.
Dietary considerations for these flavors
Vegan-Friendly Base
This recipe is naturally vegan and requires no substitutions—canned black-eyed peas are plant-based by default, and all ingredients like onion, garlic, bell pepper, and spices are inherently free of animal products. The extra-virgin olive oil and vegetable broth ensure the dish remains entirely plant-based while delivering rich, satisfying flavors. 🌱
Gluten-Free Adaptation
No gluten concerns here! All ingredients are gluten-free by nature, but always double-check labels on canned beans and broth for accidental cross-contamination. Brands like Trader Joe's and Whole Foods clearly label gluten-free products, so those are safe choices. The dish stays naturally gluten-free without any modifications.
Low-Sodium Options
To reduce sodium, opt for low-sodium canned black-eyed peas (or rinse regular cans thoroughly) and use low-sodium vegetable broth. The apple cider vinegar and fresh lime juice add acidity to balance flavors without extra salt. I often skip added salt entirely if using well-seasoned vinegar and spices.
High-Protein Boost
For extra protein, stir in ½ cup cooked quinoa or ½ cup crumbled tofu during the final 5-6 minutes of simmering. Both options absorb the smoky flavors beautifully while adding 10-12 grams of protein per serving. Quinoa also brings a nutty texture that complements the peas perfectly.
Allergen-Friendly
This recipe avoids common allergens like dairy, eggs, and nuts, making it safe for most dietary restrictions. The only potential concern is cilantro, which some people avoid due to its citrusy aroma.
Simply omit it or substitute with parsley for a milder herbaceous note. Always check individual ingredient labels for hidden allergens.
Meal Prep Flexibility
Store leftovers in an airtight container with a thin layer of olive oil to keep them fresh for 5 days in the fridge. For freezing, portion into freezer-safe containers and store for up to 3 months.
Reheat gently on the stove with a splash of water to restore moisture. The flavors actually deepen over time, making this an ideal make-ahead dish for busy weeks. ✨
Nutrition facts
Frequently asked questions
Can I use dried black-eyed peas instead of canned?
For dried peas, soak them overnight in 4 cups water, then simmer for 45-60 minutes until tender. Use 1.5 cups dried peas (about 1 cup uncooked) to replace 2 cans of canned beans. The texture will be slightly firmer, so adjust cooking time as needed.
How do I make this recipe spicier?
Add ½ teaspoon cayenne pepper or 1 teaspoon chili powder with the cumin and smoked paprika. For heat lovers, stir in 1 diced jalapeño (seeds removed) during the sauté step. Always taste before serving to adjust to your preference.
Can I prepare this dish ahead of time?
Yes! This recipe reheats beautifully. Store leftovers in an airtight container for up to 5 days in the fridge. For freezing, portion into freezer-safe containers and freeze for up to 3 months. Reheat gently on the stove with 1 tablespoon water to restore moisture. Flavors deepen over time, making it perfect for meal prep.
What's the best way to serve these black-eyed peas?
Pair them with warm corn tortillas, cilantro-lime rice, or grilled chicken/veggie tacos. For a complete meal, serve over quinoa or with a side of avocado slices. The smoky flavors also complement grilled corn or a fresh mango salad.
Why do my beans taste bland?
Blandness usually means insufficient seasoning or acidity. Boost flavor by adding 1 extra tablespoon vinegar or lime juice, or increase spices to 1.5 teaspoons smoked paprika. Also ensure you're using low-sodium beans or rinsing well. The vegetables should be cooked until soft but not mushy for best flavor absorption.