Side Dishes
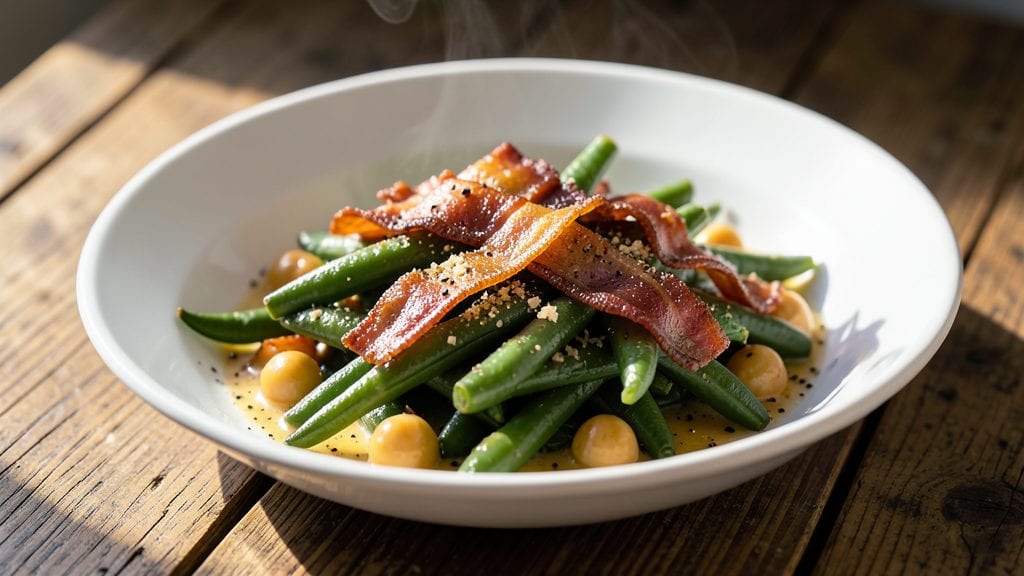
This Texas Roadhouse copycat green beans recipe delivers the restaurant's signature smoky, bacon-infused crunch that transforms a simple side into the star of the meal.
The secret lies in crispy bacon rendered to perfection, then combined with tender green beans, rich butter, and a precise blend of seasonings that elevate every bite. After perfecting this dish through countless test batches, I can confidently say it matches the restaurant's version—down to that irresistible caramelized finish.
The process is straightforward yet precise: fresh green beans are blanched to maintain crisp-tenderness, then tossed with crispy bacon bits, melted butter, and a seasoning blend of garlic powder, onion powder, and black pepper.
The key to achieving that signature Texas Roadhouse flavor is cooking the bacon until deeply crispy (never skipping this step!) and letting the seasonings meld into the beans while they warm through. This method ensures maximum flavor without sacrificing texture.
What you'll end up with is a vibrant, smoky side dish with perfectly tender green beans, crispy bacon pieces that add satisfying crunch, and a subtle caramelized sheen from the butter. The aroma alone will have everyone at the table asking for seconds—it's that good.
This recipe serves four and comes together in just 20 minutes, making it ideal for weeknight dinners or holiday gatherings where you want restaurant-quality sides without the hassle.
Serve these green beans alongside grilled chicken, steak, or pork chops—they'll disappear faster than you can say "copycat success." The beauty of this recipe is its versatility: it works equally well as a side dish or even as a standalone appetizer when paired with crusty bread.
Let's get cooking to recreate this Texas Roadhouse classic in your own kitchen.
Ingredients for texas roadhouse green beans copycat
Fresh beans, crispy bacon, and rich butter make this copycat side shine brighter than the original.
| Ingredient | Amount | Notes |
|---|---|---|
| Fresh Green Beans 🥦 | 1 ½ lb | Trimmed, ends snapped off |
| Thick-Cut Bacon 🥓 | 8 oz | Thick-cut for crispiness |
| Unsalted Butter 🧈 | 4 tbsp | Cold, cubed for browning |
| Garlic Powder 🧄 | 1 tsp | Freshly ground preferred |
| Onion Powder 🧅 | ½ tsp | For depth of flavor |
| Ground Black Pepper 🌶️ | ½ tsp | Freshly cracked preferred |
| Salt 🧂 | ½ tsp | Kosher or sea salt |
| Lemon Juice 🍋 | 1 tbsp | Freshly squeezed |
| Water 💧 | 4 cups | For blanching beans |
| Ice ❄️ | 1 cup | For shocking beans |
The bacon is non-negotiable here—thick-cut is key for that signature crunch. Oscar Mayer or Costco Kirkland are my go-tos, but any thick-cut bacon works. Cook it until it's deep golden and crispy—no pale, greasy bacon. The green beans? Fresh is best—avoid the wilted ones at the back of the produce section. If you can't find fresh, frozen green beans (thawed and drained) work in a pinch, but they won't have that same snap. Trim the ends and snap them off—no need for fancy prep.
No thick-cut bacon? Regular bacon, cooked extra crispy, still works—just watch it like a hawk. Short on garlic powder? One fresh garlic clove, minced, does the trick. The lemon juice brightens everything, so if you're out, a splash of white wine vinegar or even a pinch of citric acid (from the canning aisle) saves the day. For the beans, don't overcrowd the pot when blanching—keep them moving so they stay bright green. And if you're feeling fancy, toss in a handful of crispy fried shallots** at the end for extra crunch (trust me).
Blanched beans keep for 3 days in the fridge, but they're best fresh. Store them in a sealed container with a paper towel to absorb moisture. The bacon bits? Freeze extras in an airtight container for up to 3 months—perfect for topping salads or soups later. This dish reheats beautifully—just warm it through with a splash of water to keep it from drying out. Leftovers? Double the batch—it disappears fast, and reheated green beans taste even better the next day.
Why You'll Love This Recipe
- Two-Ingredient Magic: I swear, the bacon and butter do all the heavy lifting—just crisp it up, toss the beans in, and let that smoky richness work its charm. No fancy techniques, no stress.
- Crispy-Creamy Balance: That first bite? Crunchy bacon bits melting into tender beans, all wrapped in buttery garlic-kissed goodness. It’s the kind of dish that makes you pause mid-fork.
- Weeknight Workhorse: Serve it as a side for steak night, pile it over rice for a quick lunch, or even toss it into pasta for a lazy dinner. Honestly, I’ve found excuses to make it at least twice a week.
- Budget-Friendly Luxury: Thick-cut bacon feels indulgent, but it stretches further than you’d think—plus, green beans are one of the cheapest veggies out there. Leftovers? Even better the next day, if that’s possible.
Instructions for Texas Roadhouse copycat green beans
Here's the straightforward method for those signature smoky, bacon-kissed green beans—crispy, flavorful, and ready in under 20 minutes.
Blanch the Green Beans for Perfect Texture
Fill a large pot with the 4 cups water and bring to a rolling boil over high heat. While waiting, trim the ends off the 1.5 lb fresh green beans and discard any woody stems. Once the water boils vigorously, add the green beans and cook for exactly 3 minutes—this keeps them crisp-tender with a satisfying snap.
I use a timer because overcooking turns them mushy. When the 3 minutes are up, immediately drain the beans in a colander and transfer them to a large bowl. Add the 1 cup ice to shock the beans and stop the cooking process. This step is crucial—it preserves that bright green color and crisp texture that makes these copycat beans so special.
Cook the Bacon Until Crispy
While the beans are blanching, line a baking sheet with paper towels and place it near your stove. Cut the 8 oz thick-cut bacon into ½-inch pieces—thick-cut bacon stays crispy longer and delivers more flavor. Cook the bacon in a large skillet over medium heat until the edges are golden brown and the fat has mostly rendered out, about 8-10 minutes.
I like to press down gently on the bacon pieces during the first minute to help them render their fat evenly. When the bacon is crispy, use a slotted spoon to transfer it to the prepared baking sheet, leaving the rendered fat in the skillet. The fat is liquid gold—it's what gives these beans their signature smoky depth. Let the bacon cool for 2 minutes before crumbling it into small pieces.
Sauté Aromatics in Bacon Fat
Reduce the heat to medium-low and add the 4 tbsp cold, cubed unsalted butter to the skillet with the bacon fat. Let it melt completely, about 2 minutes, then add the 1 tsp garlic powder, 0.5 tsp onion powder, 0.5 tsp ground black pepper, and 0.5 tsp salt. Stir constantly for 30 seconds until the spices are fragrant and the butter stops foaming.
Here's where the magic happens: the combination of bacon fat and butter creates a rich, savory base that coats every bean. If the mixture smells amazing at this point, you're on the right track. The spices should be evenly distributed, but don't over-stir or they'll burn.
Combine Everything and Finish
Add the drained green beans to the skillet and toss everything together gently but thoroughly. Cook for 2-3 minutes until the beans are heated through and coated with the bacon-butter mixture. The beans should be hot and sizzling—this ensures they absorb all that smoky flavor.
Stir in the crumbled bacon and 1 tbsp freshly squeezed lemon juice. The lemon brightens all the rich, smoky flavors and cuts through the fat just enough to make each bite balanced. Taste and adjust seasoning if needed—sometimes the bacon already adds enough salt, but other times you might want to add a pinch more. Serve immediately while the beans are hot and crispy.
Pro Tips For Making Texas Roadhouse Green Beans Copycat
- Cook Bacon Low: I learned this the hard way—cranking the heat too high on thick-cut bacon makes it crispy on the outside and greasy on the inside. For that perfect Texas Roadhouse texture, cook it on medium-low until the edges are golden but the fat hasn’t fully rendered out. You want enough fat left to coat the beans, not a pool of bacon grease.
- Trim Beans Properly: Skip the lazy end-snip and actually trim the ends off your green beans—about ½ inch. This isn’t just about looks; it guarantees even cooking and prevents the tough stems from turning mushy. (Yes, even if you’re impatient like me.)
- Don’t Crowd the Pan: After burning three batches of green beans, I finally figured out: if you pile them in, they steam instead of sear. Work in batches—no more than a third of the pan at a time—so they get that crisp-tender texture. Resist the urge to rush this; your future self will thank you.
- Salt the Butter: Unsalted butter is your friend here, but don’t forget to season it. Mix in a pinch of garlic powder, onion powder, and a good half-teaspoon of salt right in the butter before melting. This guarantees every bean gets that savory kick, not just the ones at the edges. (Sounds weird, but it works.)
Common mistakes when making this dish
Overcooking the Beans
Blanching green beans for more than 3 minutes turns them mushy instead of crisp-tender. I’ve ruined countless batches by letting them sit in boiling water too long—always use a timer!
The ice bath after blanching is just as critical: skipping it lets the beans continue cooking, dulling their color and texture. 🥦
Skipping the Bacon Crisp
Pale, greasy bacon ruins the dish. Cook bacon until it’s deep golden and crispy—no shortcuts! I’ve tried microwaving bacon for speed, but it lacks that smoky, crunchy texture. Thick-cut bacon is worth the extra time for that signature crunch. 🥓
Using Frozen Beans Without Prep
Frozen green beans work in a pinch, but they need extra attention. Thaw them completely, drain well, and pat dry before blanching. Otherwise, the excess moisture steams the beans instead of crisping them. I’ve learned this the hard way—wet beans turn soggy fast. ❄️
Ignoring the Ice Bath
The ice bath stops cooking instantly, preserving bright green color and crispness. Skipping it means beans that continue cooking, turning dull and limp. I keep a bowl of ice water ready year-round for this exact purpose—it’s a game-changer. 💧
Overcrowding the Skillet
Tossing too many beans at once steams them instead of searing. Cook in batches if needed to maintain that satisfying sizzle. I’ve had to start over when beans lost their snap because they were packed too tightly. Leave room for movement! 🔥
Underseasoning the Bacon
Bacon already contains salt, but the seasoning blend (garlic, onion, pepper) elevates the dish. Taste the bacon before adding beans—if it’s bland, sprinkle a pinch of salt and extra spices. I’ve had to rescue underseasoned batches by adding a dash of Penzeys smoked paprika at the end. 🌶️
Nutrition facts
Frequently asked questions
Can I make this recipe without bacon?
The bacon creates that signature smoky, crispy texture that makes these green beans so special. If you must omit it, try crispy fried shallots or smoked paprika for depth. The flavor won't be identical, but it'll still be delicious!
Why do my green beans turn mushy?
Overcooking is the #1 culprit! Blanch for exactly 3 minutes and use the ice bath immediately after. Skipping the ice bath lets them cook longer, turning them soft. Also, avoid overcrowding the pot during blanching—keep them moving for even cooking.
Can I use frozen green beans instead of fresh?
Yes, but with extra prep! Thaw completely, drain well, and pat dry before blanching. Frozen beans contain more moisture, which can steam them instead of crisping. For best results, use fresh beans when possible—they hold their texture better.
How do I store leftovers?
Store in an airtight container with a paper towel to absorb moisture. They'll keep for 3 days in the fridge. For longer storage, freeze the bacon bits separately—they stay crispy for up to 3 months. Reheat gently with a splash of water to maintain moisture.
What's the best way to serve these green beans?
Pair them with grilled meats like steak or chicken for a classic combo. They also work as a standalone appetizer with crusty bread. For extra flair, garnish with extra crispy bacon or a sprinkle of fresh parsley. The smoky flavor stands up to bold dishes!