Side Dishes
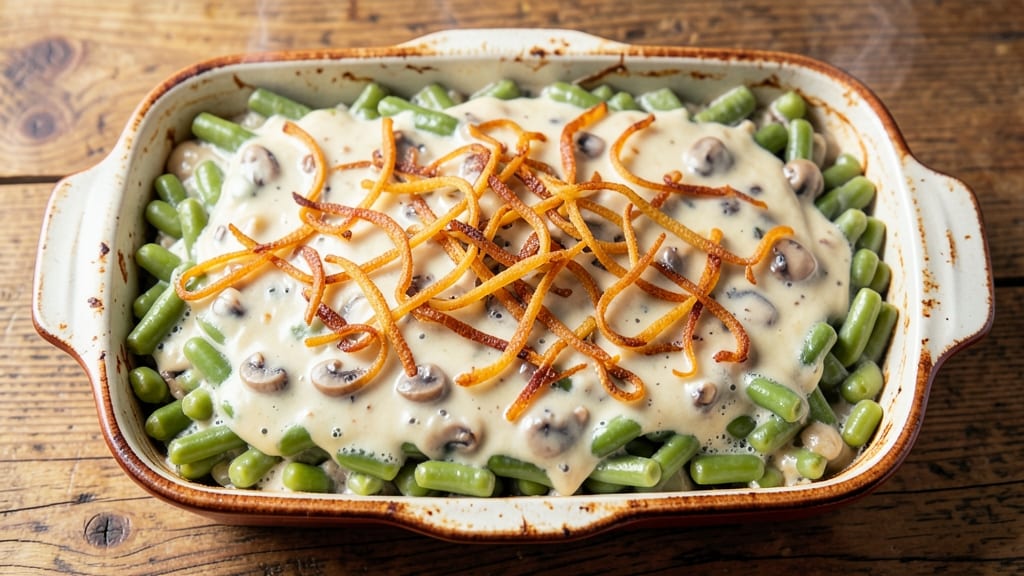
This classic green bean casserole recipe with canned green beans keeps all the creamy, cheesy comfort of a homestyle side—now with minimal prep. Using canned green beans cuts down on work while maintaining that signature creamy sauce and crispy fried onion topping.
I perfected this version after years of testing shortcuts that never sacrificed texture or flavor, and it's become a holiday staple for my family.
The beauty of this recipe lies in its simplicity: no chopping fresh beans, no waiting for them to blanch, and no complicated techniques.
You'll start by sautéing onions for a subtle sweetness that forms the base of the creamy mushroom sauce, then layer everything in a baking dish for that perfect golden-brown finish. The canned beans hold their shape while absorbing the rich, velvety sauce, creating a texture that's both tender and satisfying.
By the time it emerges from the oven, you'll have a side dish that's creamy, cheesy, and topped with crispy fried onions that add just the right crunch. This is the kind of casserole that pairs perfectly with roasted meats, holiday turkey, or even as a hearty vegetarian main.
The best part? It comes together in under 30 minutes of active prep, with most of the work happening during baking.
Serve it warm straight from the oven, garnished with extra fried onions if you're feeling fancy. This recipe is designed to be foolproof, so even if you've never made casseroles before, you'll end up with restaurant-quality results. Let's get started on this homestyle classic that never disappoints.
Ingredients for classic green bean casserole recipe with canned green beans
Two cans of green beans, a handful of pantry staples—this is your shortcut to holiday comfort.
| Ingredient | Amount | Notes |
|---|---|---|
| Canned Green Beans 🥦 | 2 cans | 14.5 oz each, drained |
| Yellow Onion 🧅 | 1 whole | Medium size, diced |
| Fresh Mushrooms 🍄 | 8 oz | White or cremini, sliced |
| All-Purpose Flour 🌾 | ¼ cup | For thickening sauce |
| Milk 🥛 | 1 cup | Whole milk for creaminess |
| Chicken Broth 💧 | 1 cup | Low-sodium preferred |
| Unsalted Butter 🧈 | ½ cup | Cold for sauce |
| Shredded Cheddar Cheese 🧀 | 1 ½ cups | Medium sharp preferred |
| Fried Onions 🧅 | ¾ cup | Store-bought or homemade |
| Salt 🧂 | 1 tsp | Kosher or sea salt |
| Ground Black Pepper 🌶️ | ½ tsp | Freshly ground preferred |
| Garlic Powder 🧄 | ½ tsp | For extra flavor |
The canned green beans are the star here, so grab the Libby's or Del Monte brand—they hold their shape best. Fresh mushrooms make all the difference (the cremini variety adds meaty texture), but button mushrooms work in a pinch. For the fried onions, I always keep a bag of French's in the pantry—it's the closest to homemade without the fuss. If you're feeling ambitious, you can make your own by thinly slicing onions and frying them in butter until crispy (worth it, but takes 15 minutes). The onion you dice for the sauce? Yellow gives the best caramelized sweetness—skip the red or white varieties here.
No chicken broth? Vegetable broth works too, or even bouillon powder mixed with water. Short on mushrooms? Extra diced onion adds depth, or swap for 1/4 cup sliced black olives for a tangy twist. The milk can be whole, 2%, or even evaporated—just know whole gives the creamiest sauce. Want to make this vegetarian? Skip the chicken broth and use vegetable broth instead. The cheese is non-negotiable though—sharp cheddar melts best, but Monterey Jack adds a smoother texture if you prefer something milder. For the flour, all-purpose is perfect, but cornstarch works too if you're avoiding gluten.
This casserole reheats beautifully—just cover with foil and bake at 350°F for 15 minutes. Keeps in the fridge for 4 days (though it's best fresh), and freezes for 3 months if you want to make it ahead. I always bake mine in a 9x13-inch dish, but an 8x8-inch works if you're serving a smaller crowd. The fried onions on top crisp up again when reheated, so don't skip adding them back before serving. Leftovers? Perfect for lunches—just portion into containers with a sprinkle of extra cheese on top.
Why You'll Love This Recipe
- Pantry to Plate: I swear by this recipe when I forget to buy fresh veggies—just drain the canned beans, toss them in the skillet with sautéed onions and mushrooms, and boom. No wilting, no chopping, no stress.
- Creamy Crunch Magic: That crispy fried onion topping isn’t just decoration—it’s the star. The buttery, golden crunch against the creamy mushroom-bean sauce? Honestly, it’s the kind of flavor that makes you pause mid-bite.
- Holiday Table Starter: Between us, this is my go-to for Thanksgiving sides. It reheats beautifully, feeds a crowd without breaking the bank, and even my picky uncle asks for seconds. (Yes, even on a Tuesday night.)
- Leftovers That Don’t Suck: I make double batches because the flavor only gets better after reheating. The mushrooms soak up the creamy sauce, and the beans stay tender—no sad, mushy leftovers here. Budget-friendly and foolproof.
Step-by-step instructions for classic green bean casserole
Here's how to make this comforting classic with canned green beans—no waiting for fresh veggies to cook.
Sauté Onions and Mushrooms for Flavor
Heat a large skillet over medium heat and melt 0.25 cup unsalted butter until it foams. Add the 1 whole yellow onion and 8 oz fresh mushrooms, cooking for 5-6 minutes until the onions are translucent and mushrooms release their moisture. You want them tender but not mushy—just enough to build flavor.
Season with 1 tsp salt, 0.5 tsp ground black pepper, and 0.5 tsp garlic powder, stirring to coat. The mushrooms should soften slightly and develop a rich, earthy aroma. This step forms the savory base that ties everything together. Transfer the mixture to a bowl and set aside for now.
Make the Creamy Sauce Mixture
In a medium saucepan, combine 1 cup milk, 1 cup chicken broth, and 0.25 cup all-purpose flour, whisking until smooth. Place the pan over medium heat and stir constantly for 3-4 minutes until the mixture thickens to a creamy consistency—it should coat the back of a spoon.
Remove from heat and stir in 1.5 cups shredded cheddar cheese until fully melted and smooth. The sauce should be velvety and thick enough to cling to the green beans. If it's too thin, add a splash more milk and thicken further. This creamy layer is what makes this casserole so comforting.
Combine All Ingredients in a Baking Dish
In a large mixing bowl, combine the sautéed onions and mushrooms with the 2 cans drained green beans. Pour the creamy cheese sauce over the top and gently stir until everything is evenly coated. Transfer the mixture to a 9x13-inch baking dish and spread it out evenly.
Top with Fried Onions and Bake to Perfection
Sprinkle the top evenly with 0.75 cup fried onions for that classic crunch. Bake at 350°F for 25-30 minutes until the top is golden brown and bubbly. The edges should be slightly crisp, and the cheese should be melted and bubbling.
Let the casserole rest for 5 minutes before serving—this helps the layers set and makes it easier to slice. The creamy sauce should coat every green bean, and the fried onions should add a satisfying crunch with each bite. This classic version delivers all the homestyle comfort you remember!
Pro Tips For Making Classic Green Bean Casserole Recipe With Canned Green Beans
- Drain and Rinse Beans: Dump those canned green beans into a colander and give them a quick cold-water rinse before tossing them in the pot. The brine clings like glue, and if you skip this, your casserole will taste like a salty soup instead of the creamy comfort dish it should be.
- Sauté Mushrooms First: Don’t just throw raw mushrooms into the mix—they’ll turn to mush and water down the sauce. Sear them in a dry pan for 5-6 minutes until they release their juices and develop a little color. This adds depth that raw mushrooms just can’t match.
- Thicken the Sauce Right: Whisk your flour and milk into a smooth paste before adding it to the pot. Lumps are the enemy here, and they’ll make your casserole look (and taste) like a failed gravy experiment. Stir constantly over medium heat until it thickens to the consistency of heavy cream—about 3-4 minutes.
- Skip the Overmixing: Once the sauce is in the beans, stir just enough to coat everything evenly. Overmixing turns the mushrooms and onions into a mushy paste, and you’ll end up with a dense, gluey casserole instead of tender, bite-sized chunks. A few gentle folds are all it takes.
Essential equipment for perfect results
Baking Dish Essentials
For this casserole, I always use a 9x13-inch baking dish—it's the perfect size for even baking and easy serving. Look for one made of heavy-gauge aluminum (like Calphalon or Farberware) for even heat distribution.
If you're serving a smaller crowd, an 8x8-inch dish works too, but reduce the recipe by about 30% to avoid overflow. Avoid glass dishes for the first bake—they don't conduct heat as well, which can lead to uneven cooking. 🔥
Skillet for Sautéing
A 10-inch cast iron skillet (like Lodge) is ideal for sautéing the onions and mushrooms—they retain heat beautifully and create that perfect caramelized flavor. If you don’t have cast iron, a non-stick stainless steel skillet (like All-Clad) works just as well.
Avoid thin, flimsy pans—they won’t distribute heat evenly, and your onions might burn before the mushrooms soften. A medium heat setting is key here to avoid burning while building flavor.
Saucepan for Creamy Mixture
For the creamy sauce, a 3-quart stainless steel saucepan (like Circulon) is my go-to—it heats evenly and prevents scorching. If you’re using a non-stick pan, keep the heat at medium-low to avoid sticking. A wooden spoon is essential for whisking the flour into the milk smoothly.
Pro tip: If your sauce gets too thick, a splash of warm milk (not boiling) will save it without breaking the emulsion. ✨
Mixing Tools
I use a large mixing bowl (at least 3-quart capacity) to combine the green beans, mushrooms, and sauce. A rubber spatula helps scrape every last bit of sauce from the bowl into the baking dish.
For stirring the sauce, a whisk ensures no lumps form when mixing the flour. If you’re short on bowls, a clean baking dish can double as a mixing vessel—just transfer everything carefully to avoid spills.
Optional: Homemade Fried Onions
If you’re making your own fried onions, grab a large skillet (again, cast iron is best) and a slotted spoon for draining.
Thinly slice 1 large yellow onion (about 1 cup slices) and fry in 0.5 cup butter over medium heat for 8-10 minutes, stirring often, until golden and crisp. Let them cool on a paper towel-lined plate before sprinkling on top.
The extra effort is worth it—they add a restaurant-quality crunch that store-bought can’t match. 💫
Nutrition facts
Frequently asked questions
Can I use fresh green beans instead of canned?
Yes, but you'll need to blanch them first! Cut 1.5 pounds fresh green beans into 2-inch pieces, boil for 3 minutes, then shock in ice water to stop cooking. Drain well before mixing with the sauce. Fresh beans work best in summer when they're at peak flavor.
Why did my casserole get watery?
This usually happens when the sauce isn't thickened enough or the baking dish isn't the right size. Make sure to cook the flour-milk mixture until it's thick enough to coat the back of a spoon, and use a 9x13-inch dish for proper heat distribution. If it's still too thin, bake uncovered for 5 extra minutes to evaporate excess liquid.
Can I make this ahead of time?
Assemble the casserole up to 24 hours ahead and refrigerate uncovered. When ready to bake, cover with foil and bake at 350°F for 30-35 minutes (5-10 minutes longer than fresh). For best results, add 5 minutes of uncovered baking time at the end to crisp the top. This makes it perfect for holiday prep!
What's the best cheese substitute?
If you're avoiding dairy, try nutritional yeast (for cheesy flavor) or dairy-free cheddar shreds. For a creamier alternative, blend 1 cup cashews with 1/2 cup water until smooth and use in place of the milk. The texture will be slightly different but still delicious.
How do I prevent the fried onions from getting soggy?
Add the fried onions right before baking, not after! If you're making it ahead, sprinkle them on just before the final 5 minutes of baking. For extra crispiness, broil for 1-2 minutes at the very end (watch closely!). Store-bought fried onions work fine too—just add them fresh from the bag.