Desserts
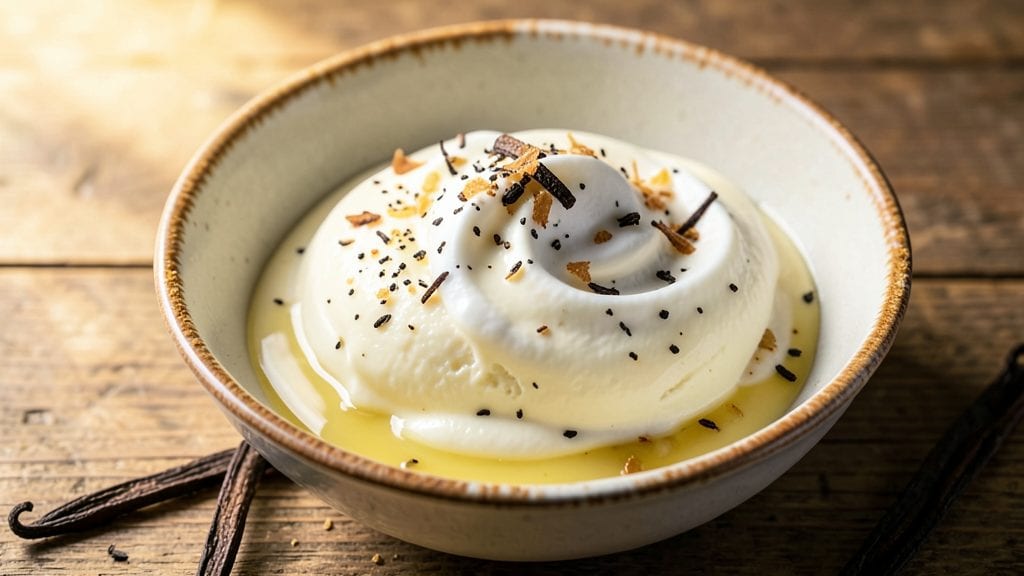
This old-fashioned vanilla bean ice cream recipe delivers the velvety swirls and deep vanilla aroma that define classic homemade dessert. The secret lies in scraping fresh vanilla bean seeds directly into the base—no artificial extracts here.
After years of testing, I’ve perfected the ratio of heavy cream, whole milk, and sugar to ensure a texture that’s impossibly smooth without being icy.
The process starts with a simple custard base, where the vanilla bean infuses every drop, creating those signature black specks of magic. Churning in an ice cream maker transforms it into a creamy masterpiece, but the real test comes when you scoop the first bowl.
The flavor develops overnight, intensifying as the ice cream rests—this is how you know it’s worth the wait.
What you’ll end up with is ultra-smooth ice cream that melts on the tongue with layers of vanilla flavor, not just the sweetness of extract. The swirls of vanilla bean seeds add visual appeal and a depth of aroma that turns every spoonful into an experience.
This isn’t just dessert—it’s a taste of nostalgia, made better by real technique.
Perfect for summer gatherings, holiday treats, or simply indulging in a bowl of pure comfort. The recipe scales easily, so you can make enough to share—or keep it all for yourself. Let’s get churning!
Ingredients for old fashioned vanilla bean ice cream
Nine simple ingredients transform into velvety swirls of pure vanilla magic.
| Ingredient | Amount | Notes |
|---|---|---|
| Heavy Whipping Cream 🥛 | 2 cups | Full-fat for best texture |
| Whole Milk 🥛 | 1 cup | Cold for smooth churning |
| Granulated Sugar 🍚 | 1 cup | Superfine preferred for dissolving |
| Vanilla Bean Pods 🌿 | 2 whole | Madagascar or Tahitian preferred |
| Large Egg Yolks 🥚 | 4 whole | Room temperature for blending |
| Unsalted Butter 🧈 | ½ cup | Cold, cubed for swirls |
| Vanilla Extract 🍯 | 1 tsp | Pure alcohol-based extract |
| Salt 🧂 | ¼ tsp | Fine sea salt for balance |
| Pure Vanilla Sugar 🍚 | 1 tbsp | Optional for extra depth |
The vanilla bean is non-negotiable here. Madagascar beans give that classic creamy flavor, while Tahitian adds floral notes—both work. Grab the whole pods at Whole Foods or specialty stores like Penzeys. If you're using a split pod, scrape every last seed—those tiny black specks are where the real flavor lives. The heavy cream should be stone cold from the fridge, and the butter? Cold cubes melt beautifully during churning, creating those signature swirls. Skip the pre-whipped stuff—real cream makes real ice cream.
No vanilla bean pods? Double the vanilla extract and add a pinch of vanilla sugar, but you’ll miss those signature specks. Using store-bought vanilla sugar? Check the label—some mixes contain extract. The eggs? Room temperature blend smoother, but if they’re cold, just give them 10 minutes on the counter. For the sugar, superfine dissolves faster, but regular works if you whisk it well. And if you’re worried about raw eggs, pasteurized yolks are a safe swap—just check the label. The salt might seem like nothing, but it balances the sweetness perfectly.
This ice cream tastes even better the next day as flavors meld. Store in an airtight container with parchment between layers to prevent freezer burn. Keeps for 2-3 months in the freezer, though I’ve never had it last that long. For serving, let it sit at room temperature for 5-10 minutes—it’ll be smoother and scoop easier. Double the recipe? Just scale everything up—it churns the same, every time.
Why You'll Love This Recipe
- No Special Tools Needed: I swear by this recipe because it only needs a saucepan and a whisk—no ice cream maker required. Just heat, stir, and chill. That’s it. Honestly, I’ve made it on my kitchen counter while waiting for dinner to cook.
- Velvet Smooth Texture: The egg yolks are the secret—they give it that ultra-creamy, almost custard-like richness you won’t find in store-bought versions. Between us, the first time I tasted it, I paused mid-scoop and just stared at my bowl.
- Summer’s Best Friend: This isn’t just dessert—it’s my go-to for hot days, potlucks, or when I need a quick treat after dinner. I’ll be real: I’ve even frozen it in small containers to toss in lunchboxes or grab for a late-night snack. No guilt, just pure vanilla bliss.
- Leftovers That Last: A full batch makes about a quart, and it stays perfect in the freezer for weeks. The best part? It doesn’t get icy or grainy like some homemade ice creams. My freezer’s always stocked—because why make one batch when you can have it ready for any craving?
Step-by-step instructions for ultra-smooth vanilla bean ice cream
Here's how to make the creamiest, most aromatic vanilla bean ice cream you've ever tasted—no shortcuts, just pure flavor.
Infuse the Cream and Milk with Vanilla
In a medium saucepan, combine the 2 cups heavy whipping cream, 1 cup whole milk, the 2 whole vanilla bean pods (split lengthwise), and the 1 tbsp pure vanilla sugar. Bring to a gentle simmer over medium heat, then immediately reduce to low heat. Let it steep for 15-20 minutes, stirring occasionally—you'll see the vanilla seeds release their rich, golden color and aroma. This step is crucial for maximum vanilla flavor.
While steeping, scrape the insides of the vanilla bean pods with a small knife and add the scraped seeds to the cream mixture. Remove the empty pods and discard them. The cream should now smell like a vanilla farm in spring. Let the mixture cool completely to room temperature before proceeding—this prevents scrambling the egg yolks later.
Make the Custard Base
In a separate bowl, whisk together the 4 whole large egg yolks, 1 cup granulated sugar, and 0.25 tsp salt until smooth and pale. Slowly pour the warm vanilla-infused cream mixture into the egg yolks while whisking constantly. This tempering step ensures the eggs cook gently without curdling.
Return the mixture to the saucepan and cook over medium-low heat, stirring constantly with a wooden spoon. The custard will thicken gradually—you're looking for it to coat the back of the spoon and reach 170-175°F on an instant-read thermometer. This usually takes about 5-7 minutes. Remove from heat immediately to prevent overcooking, which would make the ice cream grainy.
Chill and Incorporate Butter
Strain the custard through a fine-mesh sieve into a clean bowl to remove any lumps. Press a piece of plastic wrap directly onto the surface to prevent a skin from forming, then refrigerate for at least 4 hours or overnight. This chilling step is essential for developing the smooth texture.
Once thoroughly chilled, whisk in the 0.5 cup cold unsalted butter, cut into small cubes, until fully incorporated. The butter adds richness and helps create those beautiful swirls. Taste the mixture and adjust sweetness if needed—you want it to balance perfectly with the vanilla. The custard should be thick but still pourable at this stage.
Churn the Ice Cream
Pour the chilled custard into your ice cream maker and churn according to the manufacturer's instructions, typically 20-25 minutes. The ice cream will go from liquid to soft-serve consistency. Scrape down the sides of the bowl with a spatula to ensure even freezing.
For the signature swirls, divide the ice cream into two portions. Add 1 tsp vanilla extract to one portion and mix well. Spoon the plain ice cream into a freezer-safe container, then dollop the vanilla-infused ice cream on top. Use a knife to gently swirl the two together. Freeze for at least 4 hours or until completely firm.
Pro Tips For Making Old Fashioned Vanilla Bean Ice Cream
- Scrape the Vanilla Bean: Split the pod lengthwise with a sharp knife, then scrape out every last speck of seeds—don’t just slice it open and call it done. Those tiny black flecks are where the real flavor hides, and skipping them means missing half the magic. (Yes, it’s tedious, but your ice cream will taste like you spent hours over it.)
- Heat the Cream Slowly: Warm the cream and milk together over medium-low heat until it just simmers—no rolling boil, no rushing. I used to crank the heat and wonder why my custard sometimes broke; patience here keeps the yolks from scrambling and the texture silky. Think "gentle kiss," not "microwave blast."
- Strain the Custard Twice: First strain through a fine-mesh sieve to catch any cooked yolk bits, then strain again through cheesecloth for that absurdly smooth finish. The second pass removes the grittiness that sneaks in, even when you think you’ve got it all. (Trust me, your ice cream will taste like a luxury brand.)
- Chill the Custard Flat: Spread the custard into a wide, shallow dish and refrigerate it until it’s ice-cold to the touch—no lukewarm spots. I learned this after my first batch churned into a grainy mess because the center stayed warm too long. A cold custard churns faster and stays creamier. (Pro move: Use a metal bowl for even cooling.)
Serving suggestions for this dish
Classic Vanilla Bean Bowl
Serve your ice cream in a chilled glass bowl lined with fresh mint leaves for a touch of elegance. I like to add a sprinkle of vanilla sugar on top and a dash of sea salt to enhance the flavors.
Garnish with a thin vanilla bean slice on the side for visual appeal. The contrast of cool glass and the creamy ice cream makes every bite feel special. 💛
Warm Cookie Crunch
For texture, serve your ice cream with warm chocolate chip cookies or shortbread cookies on the side. I recommend Nilla Wafers or homemade snickerdoodles—the warmth of the cookie against the cold ice cream is pure magic. Toast the cookies for 30 seconds to enhance their flavor before serving.
Fruit Toppings
Fresh berries add a vibrant pop of color and freshness. I love raspberries, blackberries, and sliced strawberries drizzled with a light honey syrup (just 1 tbsp honey and 1 tsp water heated together).
For a tropical twist, add mango chunks or kiwi slices—the acidity cuts through the richness beautifully.
Boozy Upgrades
For an adult twist, drizzle vanilla-infused bourbon or Kahlúa over the ice cream. I like to warm 1 oz bourbon with 1 tsp vanilla sugar and 1 tsp heavy cream, then drizzle it over the scoop.
A splash of orange liqueur adds a citrusy brightness that pairs perfectly with vanilla. 🍷
Ice Cream Sundae Bar
Turn serving into an interactive experience by setting up a sundae bar. Offer toppings like crushed Oreos, caramel sauce, whipped cream, chopped nuts, and extra vanilla bean seeds. Let guests build their own creations—it’s always a hit at parties and family gatherings.
Presentation Tips
Use parchment-lined plates to prevent sticking and make cleanup easier. For a restaurant-style touch, place a small vanilla bean pod on the side of the plate.
Serve with a silver spoon for an extra touch of sophistication. Remember, presentation matters—it’s the first thing guests notice before taking that first bite. ✨
Nutrition facts
Frequently asked questions
Can I make this ice cream without an ice cream maker?
Yes! Use the no-churn method by whipping 2 cups heavy cream to stiff peaks, then folding it into the chilled custard base. Freeze in a metal loaf pan for 6-8 hours, stirring once halfway. For extra creaminess, add 1 cup whipped cream at the end. The texture won't be as smooth as churned, but it's still delicious!
Why does my vanilla ice cream taste bland or one-dimensional?
Most likely, you didn't use enough vanilla flavor sources. This recipe relies on 2 whole vanilla beans (not extract) plus 1 tsp vanilla extract for depth. Always scrape the seeds from the pods—those tiny specks pack serious flavor! Also, make sure your custard cooked to 170-175°F and chilled completely before churning.
How do I store leftovers to keep them smooth?
Transfer scooped portions to an airtight container with parchment paper between layers. Press plastic wrap directly on the surface to prevent ice crystals. Store for up to 2 weeks in the freezer. For serving, let sit at room temperature for 5-10 minutes—it'll be creamier and scoop easier than straight from the freezer.
Can I substitute vanilla extract for vanilla beans?
You can try, but you'll miss the signature specks and complex aroma. For best results, use 2 tsp high-quality vanilla extract plus 1 tbsp vanilla sugar** (made by drying vanilla bean seeds in sugar). This adds some depth, though nothing beats real vanilla beans. If you're on a budget, look for Madagascar vanilla beans at specialty stores—they're worth the splurge!
What's the secret to ultra-smooth texture?
The key is proper custard cooking and chilling. Cook the custard to 170-175°F (not boiling), then chill it completely before churning. Also, strain the custard through a fine-mesh sieve to remove any lumps. The 4-hour refrigeration before churning develops the smoothness—never skip this step! Adding cold butter at the end also helps create that signature velvety mouthfeel.