
Side Dishes
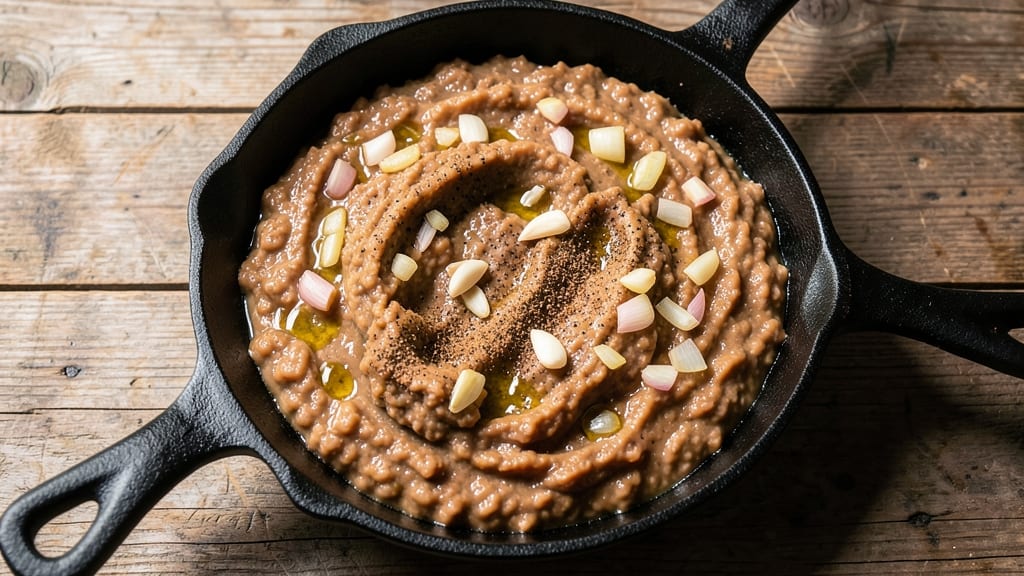
This traditional refried beans recipe delivers the creamy, mashable texture that defines Mexican comfort food, where lard or oil creates that signature richness. The secret lies in slow-cooking dried pinto beans until they break down into a velvety purée, then frying them in fat until golden and fragrant.
I've perfected this method over years of testing—no shortcuts, just the authentic technique that makes these beans irresistibly smooth yet hearty.
The process begins with soaking beans overnight to soften them, then simmering until they're tender enough to mash by hand or with a potato masher. Onions and garlic form the flavor base, while lard (or vegetable oil for a vegetarian version) adds that unmistakable depth.
A pinch of cumin and salt transforms simple ingredients into something deeply satisfying, with optional chili powder for heat. Every bite should be creamy yet substantial, with just enough bite to keep it interesting.
What sets these apart is the texture—no grainy bits, no watery consistency. The beans should cling together when mashed, creating that perfect spreadable quality that works as a side, dip, or even a filling for tacos.
Serve warm with a sprinkle of cheese, a dollop of sour cream, or fresh cilantro for brightness. This is the kind of dish that tastes like home, with every spoonful packed with tradition and flavor.
Whether you're making them for a family gathering or a solo meal, this recipe delivers restaurant-quality results with minimal effort. The key is patience—letting the beans cook low and slow ensures that mashable, luxurious texture.
Once you try this method, you'll never go back to canned versions. Let's get started on creating the perfect batch.
Ingredients for traditional refried beans
Dried pinto beans, aromatic spices, and a touch of acidity create this creamy, velvety masterpiece.
| Ingredient | Amount | Notes |
|---|---|---|
| Dried Pinto Beans 🌱 | 2 cups | Unsoaked, rinsed well |
| Vegetable Oil 🫒 | ½ cup | For frying, neutral flavor |
| Yellow Onion 🧅 | 1 whole | Medium size, chopped fine |
| Garlic Cloves 🧄 | 6 cloves | Peeled, minced finely |
| Ground Cumin 🌿 | 1 tsp | Toasted for deeper flavor |
| Salt 🧂 | 1 ½ tsp | Kosher or sea salt |
| Chili Powder 🌶️ | 1 tsp | Adjust for heat preference |
| Fresh Cilantro 🌿 | ¼ cup | Chopped, for garnish |
| Lime Juice 🍋 | 1 tbsp | Freshly squeezed |
| Water 💧 | 6 cups | For soaking and cooking |
| Vegetable Broth 🥄 | 2 cups | Low-sodium preferred |
The foundation starts with dried pinto beans—never skip soaking them overnight, even if using the quick-soak method. Bob's Red Mill or store-brand dried beans work perfectly, but avoid pre-cooked canned beans for that authentic texture. The key is patience: simmering until beans break down completely ensures that silky, mashable consistency. For the fat, vegetable oil delivers the same richness as lard without compromising the vegetarian diet. Grab a high-smoke-point oil like avocado or refined coconut oil from Trader Joe's for best results—just enough to coat the beans while frying.
No fresh cilantro? Dried cilantro or parsley works in a pinch, though fresh adds that bright finish. Short on lime juice? White vinegar or lemon juice keeps the acidity balanced. The chili powder is optional, but Penzeys brand offers a smoky, authentic flavor if you want to elevate it. For the onion and garlic, yellow onions add sweetness while white onions bring sharper bite—use whichever you prefer. The vegetable broth adds depth, so low-sodium versions prevent over-salting the final dish. If you're short on time, a pressure cooker
Refried beans keep for 5 days in the fridge, stored in an airtight container with a layer of oil on top to preserve freshness. For longer storage, freeze portions in 1-cup servings—they reheat beautifully straight from frozen. Double the batch and freeze half; you'll thank yourself later. The texture actually improves after reheating, as the beans absorb more of the surrounding flavors. Serve warm with warm tortillas or as a taco filling—this is the kind of dish that tastes even better the next day.
Why You'll Love This Recipe
- No-Soaking Needed: I’ll admit—I used to dread the long soak. But these beans? Just a quick rinse, then simmer. That’s it. The dried pintos soften up while you chop the onion and garlic, so you’re not stuck staring at a bowl of water for hours.
- Earthy, Smoky Magic: That cumin? Oh, it’s the star. Deep, toasty, and just a whisper of heat—like a warm hug for your taste buds. The onions caramelize right in the pot, giving them this sweet, jammy richness that makes every bite ridiculously good.
- Taco Night Every Night: Seriously, this is my lazy genius move. Spread it on toast for breakfast, slather it on nachos, or serve it alongside enchiladas. Even my picky son asks for it—(yes, even on a Tuesday night)—because it’s that universally loved.
- Budget Stretch King: A pound of dried beans feeds my family for days, and costs pennies on the dollar compared to canned. Plus, the leftovers? Just reheat with a splash of water, and they’re even better the next day—like a flavor upgrade. My wallet and my freezer thank me weekly.
Step-by-step instructions for traditional refried beans
Here's the authentic method for achieving that classic, creamy, mashable texture that defines traditional refried beans.
Prepare and Soak the Dried Pinto Beans
Place the 2 cups dried pinto beans in a large bowl and rinse them thoroughly under cold water. This removes any debris and helps prevent bitterness during cooking. Transfer the rinsed beans to a large pot and cover them with the 6 cups water. Let them soak for at least 8 hours or overnight at room temperature—this ensures even cooking and prevents them from breaking apart during mashing.
After soaking, drain the beans and rinse them again under cold water. This step removes excess starch that could make the beans gummy during cooking. Return the drained beans to the pot and add the 2 cups vegetable broth. Bring to a boil over high heat, then reduce to a simmer and cook for 45-60 minutes until the beans are tender but not mushy. You'll know they're ready when they mash easily with a fork and the skins begin to break down slightly.
Sauté Aromatics in Vegetable Oil
While the beans cook, heat the 0.5 cup vegetable oil in a large skillet over medium heat. Add the finely chopped 1 whole yellow onion and cook for 5-7 minutes until softened and translucent. Add the 6 minced garlic cloves and cook for an additional 1 minute until fragrant—this step develops the foundation of flavor for your beans.
Real talk: Don't let the garlic burn. It should smell sweet and nutty, not bitter. If the oil starts to smoke excessively, reduce the heat slightly. Once the aromatics are cooked, remove the skillet from heat and set it aside—you'll add the beans to this flavorful oil base in the next step.
Cook and Mash the Beans
Drain the cooked beans, reserving about 1 cup of the cooking liquid. Add the beans to the skillet with the sautéed onions and garlic, along with the 1 tsp ground cumin, 1.5 tsp salt, and 1 tsp chili powder. Stir well to combine all ingredients and cook over medium-low heat for 5 minutes, allowing the spices to toast slightly and infuse the beans.
Using a potato masher or wooden spoon, begin mashing the beans directly in the skillet. Add the reserved cooking liquid gradually, 2 tablespoons at a time, until you achieve a smooth, creamy consistency. The texture should be thick and spreadable, similar to hummus. If it becomes too dry, add more liquid; if too thin, cook longer to evaporate excess moisture. This mashing process creates the signature texture of traditional refried beans.
Finish and Serve
Once the beans reach your desired consistency, stir in the 0.25 cup chopped fresh cilantro and 1 tbsp lime juice. These final ingredients brighten the flavor and balance the richness of the beans. Taste and adjust seasoning if needed—you may want to add more salt or chili powder depending on your preference.
Serve the refried beans immediately while warm. They're perfect as a side dish for breakfast, paired with eggs and tortillas, or as a filling for burritos and tacos. For best results, don't reheat them—they tend to dry out. If you must reheat, add a splash of water or broth to restore moisture and stir over low heat until warmed through.
Pro Tips For Making Traditional Refried Beans
- Soak Beans Overnight: DESCRIPTION: I learned this the hard way—rushing the soak with dried pinto beans leaves them tough and gummy. Use a 12:1 bean-to-water ratio, cover, and let them sit at least 12 hours (or overnight). No, the microwave shortcut doesn’t cut it—your beans will fight you later.
- Sauté Onions Low and Slow: DESCRIPTION: After burning three batches, I finally figured out that onions for refried beans need patience. Cook them in vegetable oil over medium-low heat for 10-12 minutes until deep golden, not browned. This builds flavor without bitterness—yes, even if you’re impatient like me.
- Mash with a Potato Masher: DESCRIPTION: Skip the immersion blender if you want texture. After simmering the beans until tender, drain them and mash directly in the pot with a potato masher—just enough to break them down. This keeps some chunkiness and saves you from cleaning a blender. (Your future self will thank you.)
- Toast the Cumin First: DESCRIPTION: Sounds weird, but it works: Bloom the ground cumin in the oil for 30 seconds before adding onions. This deepens its earthy flavor and stops it from tasting like dust. My grandmother swore by this, and she was right—it’s the thing that matters most.
Regional styles of this traditional refried beans
Northern Mexican Style
In Northern Mexico, refried beans often incorporate lard instead of oil, giving them a richer, more authentic flavor. I like to use leaf lard (from pork fat) for that classic taste, though vegetable shortening works perfectly for a vegetarian version.
These beans tend to be slightly firmer and less creamy, almost like a rustic mash. The key is to cook them longer over medium-low heat while mashing with a wooden spoon—this creates a heartier texture that pairs beautifully with breakfast dishes like huevos rancheros or chilaquiles. 🌶️
Oaxacan-Inspired
Oaxaca takes refried beans to another level by adding epazote (a Mexican herb) and sometimes tomato purée for depth. Start by sautéing 1 small onion and 3 garlic cloves in 3 tablespoons of oil, then stir in 1 tablespoon of epazote (dried or fresh) along with the cooked beans.
For extra richness, I blend in ½ cup tomato purée before mashing. These beans have an earthy, slightly tangy profile that works perfectly with mole dishes or as a filling for tlayudas (Oaxacan "pizza"). The texture stays thick and chunky, not overly smooth. 🌿
Texas-Style Frijoles
Texas puts its own spin on refried beans by often including chili powder and sometimes bacon fat for extra smokiness. I like to toast 1 teaspoon of chili powder with the onions and garlic before adding the beans, then finish with a splash of beef broth instead of vegetable broth.
These beans are slightly spicier and heartier, making them a staple for Tex-Mex dishes like burritos or enchiladas. For an extra Texas touch, top with crumbled queso fresco and sliced jalapeños before serving. The texture is thick but still spreadable, perfect for scooping with tortilla chips. 🌵
Vegetarian Adaptations
For a fully vegetarian version, swap lard or bacon fat for refined coconut oil or avocado oil—both add richness without animal products. I also recommend using low-sodium vegetable broth and adding a pinch of smoked paprika for depth.
These beans work perfectly as a vegan dip with tortilla chips or as a taco filling when mixed with sautéed peppers and onions. The texture remains creamy and satisfying, proving that traditional refried beans can be just as delicious without meat-based fats. 🌱
Breakfast Specialty
In many Mexican households, refried beans are a breakfast staple—often served with scrambled eggs, queso fresco, and warm tortillas. To make them extra breakfast-friendly, I like to add a dash of cinnamon (just ¼ teaspoon) and a pinch of sugar while mashing.
This sweet-spicy twist pairs perfectly with chorizo or huevos divorciados. The beans should be smooth but still slightly rustic, with a hint of warmth from the spices. Serve them in a cast-iron skillet for that classic diner vibe. ☀️
Nutrition facts
Frequently asked questions
Can I use canned beans instead of dried for this recipe?
While you can use canned beans in a pinch, it won't give you that authentic, creamy texture. Canned beans are already pre-cooked and lack the starch that develops when dried beans break down slowly. If you must use canned, drain them well, mash thoroughly, then fry in oil for 5-7 minutes to develop flavor. For best results, stick with dried beans—it's worth the extra time!
Why do my refried beans turn out too dry or crumbly?
This usually happens when beans aren't cooked long enough before mashing or when too much liquid evaporates during frying. Always simmer beans until they're tender enough to mash easily with a fork. After mashing, add reserved cooking liquid 2 tablespoons at a time until you reach a smooth, spreadable consistency. Cover the skillet while cooking to retain moisture.
What's the best way to store leftover refried beans?
Store in an airtight container with a thin layer of oil on top to prevent drying. They'll keep in the fridge for 5 days or freeze for up to 3 months. When reheating, add a splash of water or broth and warm over low heat—never microwave directly as it makes them gummy. The texture actually improves after reheating!
Can I make these beans spicier?
For extra heat, add ½ teaspoon cayenne pepper or 1 chopped chipotle pepper in adobo sauce while mashing. You can also stir in ½ cup diced jalapeños or a dash of hot sauce at the end. Start with small amounts—you can always add more, but you can't take it out!
How do I make these vegetarian without sacrificing flavor?
Replace lard with refined coconut oil or avocado oil and use low-sodium vegetable broth. For depth, add ½ teaspoon smoked paprika or a pinch of liquid smoke. The texture stays creamy, and the flavor remains rich—just as satisfying as the traditional version!