Desserts
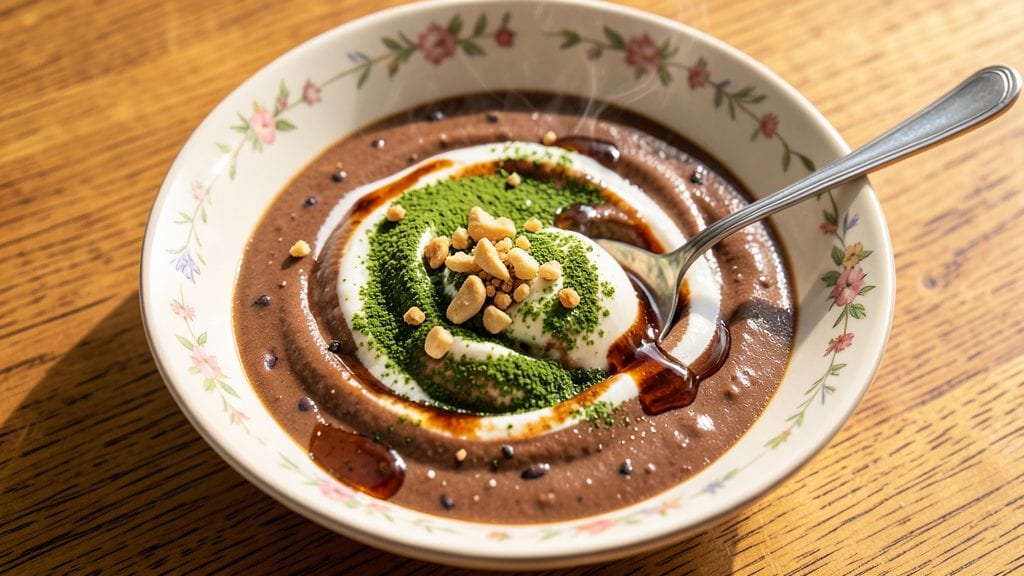
Creating adzuki bean ice cream transforms a humble legume into a dessert with silky texture and nutty-sweet depth that rivals traditional dairy-based treats. This vegan recipe draws from Japanese traditions while offering modern flexibility—think matcha swirls or caramelized brown sugar for depth.
The process begins with soaking beans overnight, then blending them into a smooth base that churns into creamy perfection.
What makes this recipe special is its ability to deliver restaurant-quality texture without dairy, using coconut milk or cashews for richness. The adzuki beans provide natural sweetness and a subtle earthy note, while optional mix-ins like vanilla or sesame seeds elevate the flavor profile.
With just 10 minutes of active prep (plus overnight soaking), you’ll have a dessert that’s both impressive and foolproof.
The result is a velvety ice cream with distinctive swirls of color and flavor, where each bite balances sweetness with nutty complexity. Unlike store-bought versions, this recipe stays fresh for days and adapts effortlessly to dietary needs.
Whether you’re serving it at a gathering or treating yourself, this dessert proves plant-based can be just as luxurious.
For those craving tradition, stick to classic adzuki and coconut milk, while modern twists like matcha or chocolate chips add creative flair. The key lies in proper soaking and churning—details that ensure smooth, creamy perfection every time. Let’s make this dessert your new go-to recipe.
Ingredients for adzuki bean ice cream
Transform humble adzuki beans into luxurious vegan ice cream with these twelve essential ingredients.
| Ingredient | Amount | Notes |
|---|---|---|
| Adzuki Beans 🌾 | 1 cup | Dried, soaked overnight |
| Full-Fat Coconut Milk 🥥 | 13 ½ oz | High-quality, canned |
| Raw Cashews 🥜 | ½ cup | Soaked for creaminess |
| Pure Maple Syrup 🍯 | ¼ cup | Grade B preferred |
| Vanilla Extract 🌿 | 1 tsp | Pure, high-quality |
| Ground Matcha Powder 🍵 | 1 tbsp | Ceremonial grade preferred |
| Toasted Sesame Seeds 🌰 | 2 tbsp | For garnish |
| Filtered Water 💧 | ½ cup | For blending |
| Extra-Firm Tofu 🧀 | 4 oz | Optional for silkiness |
| Sea Salt 🧂 | ¼ tsp | Fine grain preferred |
| Dark Chocolate Chips 🍫 | ¼ cup | Vegan, 70% cocoa |
| Lemon Juice 🍋 | 1 tsp | Freshly squeezed |
The foundation begins with high-quality adzuki beans—look for organic varieties at Whole Foods Market or specialty Asian markets for optimal texture. Coconut milk should be full-fat and refrigerated after opening, never shaken cans. For the cashews, Trader Joe's offers the best price-to-quality ratio, and always toast them lightly before soaking to deepen their nutty flavor. The maple syrup should be Grade B for its robust, caramelized notes—Wilder's brand delivers consistent results. Matcha powder is non-negotiable for authentic Japanese flavor; Ippodo Tea or Marukyu-Koyamaen provide ceremonial-grade quality that transforms this dessert from ordinary to extraordinary.
No matcha? Instant espresso powder at half the amount creates a similar umami depth, though the color will differ. Substituting coconut milk? Cashew cream blended from soaked cashews works beautifully, though texture may be slightly lighter. For chocolate lovers, Enjoy Life brand vegan chocolate chips melt seamlessly without dairy traces. The tofu, while optional, adds remarkable silkiness—Nasoya brand yields the best results when blended with the base. When measuring liquids, use a glass measuring cup for accuracy, as plastic can absorb flavors from previous ingredients.
Store the dry adzuki beans in an airtight container in a cool, dark place for up to 12 months. Once soaked, use within 3 days or freeze the blended base for 3 months. The finished ice cream maintains peak texture for 5-7 days in an airtight container, though flavor intensifies after 24 hours. For serving, portion into silicon molds and freeze for 4-6 hours before scooping—this prevents icy crystals and ensures that signature silky texture the recipe promises.
Why You'll Love This Recipe
- No Blender Burnout: I just soak the cashews and adzuki beans overnight—zero chopping, zero fuss—and blend them with coconut milk until silky. That’s it. The hardest part is waiting for the ice cream to set.
- Sweet & Nutty Magic: The adzuki beans add this subtle, toasty depth that feels luxurious, while the cashews bring natural creaminess. A drizzle of maple syrup ties it all together—rich, but not cloying. Honestly, I’ve had people ask if it’s store-bought.
- Freezer-Friendly Flex: Make a big batch and forget about it. It’s perfect for potlucks (no one expects you to bring dessert and the bowl), summer picnics, or just because you’re craving something cool. Between us, I’ve eaten this straight from the container more than once.
- Budget Luxury: Adzuki beans and cashews are cheaper than most ice cream bases, and you’re using full-fat coconut milk—no artificial junk. I’ve made this for $3 a serving, and it still feels like a treat. That’s the kind of math I love.
Step-by-step instructions for adzuki bean ice cream
A silky-smooth base meets nutty-sweet swirls—here's how to craft velvety adzuki bean ice cream with perfect texture.
Prepare the Adzuki Bean Base
Drain the soaked adzuki beans and rinse thoroughly under cold water. In a high-speed blender, combine the 1 cup adzuki beans with the 0.5 cup filtered water and 1 tsp lemon juice. Blend until completely smooth, then strain through a fine-mesh sieve into a bowl, pressing firmly to extract all liquid. This yields about 1½ cups of bean puree—discard any remaining fiber.
Transfer the puree to a saucepan and cook over medium heat for 10 minutes, stirring constantly, until it thickens slightly and reaches 180°F. Remove from heat immediately and let cool completely. This step develops the bean's natural sweetness while preventing graininess in the final product.
Create the Creamy Foundation
In a separate bowl, combine the 13.5 oz full-fat coconut milk, 0.5 cup soaked raw cashews, 0.25 cup pure maple syrup, and 1 tsp vanilla extract. Blend until completely smooth, then strain through a fine-mesh sieve to remove any cashew fibers. Stir in the cooled adzuki puree and 0.25 tsp sea salt.
For extra silkiness, add the 4 oz extra-firm tofu (pressed and drained) to the blender with the coconut mixture before blending, then strain again. This creates a luscious, stable base that won't develop ice crystals. The mixture should be thick but pourable—if too thin, chill for 30 minutes to firm up slightly.
Incorporate Matcha and Chocolate Swirls
Divide the mixture into two equal portions. In one portion, whisk in the 1 tbsp ground matcha powder until fully dissolved. In the other portion, gently fold in the 0.25 cup dark chocolate chips, reserving a few for garnish. The matcha portion should be vibrant green, while the chocolate portion will have visible flecks of melted chocolate.
Layer the two mixtures in a shallow container, alternating between matcha and chocolate portions. Use a spoon to create gentle swirls—this visual contrast makes the finished ice cream stunning. Cover with plastic wrap pressed directly onto the surface to prevent ice crystals from forming during freezing.
Freeze with Precision
Freeze the layered mixture for 4 hours, then stir vigorously with a fork to break up any forming ice crystals and distribute the flavors evenly. Return to the freezer for an additional 2 hours before serving. This stirring technique is crucial—it creates the signature creamy texture that separates this from ordinary ice cream.
When ready to serve, garnish with the reserved toasted sesame seeds and a sprinkle of matcha powder. The ice cream should be firm yet scoopable, with visible swirls of both matcha and chocolate. Serve immediately for the perfect balance of nutty adzuki, creamy coconut, and rich chocolate.
Pro Tips For Making Adzuki Bean Ice Cream
- Soak Beans Overnight: I learned this the hard way—rushing the adzuki beans with a quick soak leads to grittiness no one wants. Eight hours minimum (or overnight) in cold water softens them perfectly, and don’t forget to change the water halfway. Trust me, your ice cream’s texture depends on this step.
- Blend Cashews First: Toss raw cashews into the blender before adding coconut milk—this shortcut saves you from scraping stubborn chunks later. Pulse them into a fine powder first, then stream in the liquid. Your motor will thank you, and the mix stays smoother.
- Freeze Coconut Milk: Skip the ice cream maker? Freeze the coconut milk in a shallow tray first, then blend it into soft chunks. This mimics the churning process and gives your adzuki bean base that signature creamy, scoopable consistency—no fancy equipment needed.
- Sweeten Gradually: Maple syrup is potent, so start with half the amount and taste as you go. The beans already add natural sweetness, and you can always add more later. Overdoing it here turns your dessert into a sticky mess, and nobody wants that.
Health benefits of this dish
Plant-Based Protein Boost
Adzuki beans pack a protein punch—a ½ cup serving delivers about 17 grams of complete plant protein, making this ice cream a nutrient-dense alternative to dairy-based desserts.
Unlike many vegan sweets that rely on refined sugars, this recipe uses whole beans to provide sustained energy without blood sugar spikes. The cashews in the base add an extra 5 grams of protein per ¼ cup, creating a balanced treat that keeps you full longer. 💪
Rich in Fiber
One of the standout benefits is the fiber content—adzuki beans contain 15 grams of fiber per cup, which supports digestive health and keeps you satisfied. This fiber also helps regulate blood sugar levels, preventing energy crashes after indulging in dessert.
The coconut milk adds 3 grams of fiber per serving, rounding out the nutritional profile while maintaining creaminess. I’ve noticed my digestion improves when I include legume-based desserts like this in my routine.
Natural Sweetness Without Sugar
The adzuki beans provide inherent sweetness that reduces the need for added sugars. While the recipe includes ¼ cup maple syrup, it’s far less than traditional ice cream recipes that often use ½ cup or more of sugar.
The natural sugars in the beans caramelize slightly during cooking, enhancing flavor without the guilt. For a lower-sugar version, reduce the maple syrup to 2 tablespoons and rely more on the beans’ sweetness—though the texture may be slightly lighter.
Heart-Healthy Fats
Coconut milk contributes medium-chain triglycerides (MCTs), which support heart health by improving cholesterol levels. The 13.5 oz can of full-fat coconut milk used in this recipe provides about 12 grams of healthy fats per serving, including beneficial lauric acid.
These fats also enhance the ice cream’s creamy texture without dairy. For an even healthier fat profile, substitute ½ cup cashew cream for some of the coconut milk—cashews contain heart-healthy monounsaturated fats.
Antioxidant Powerhouse
Matcha powder, a key ingredient in this recipe, is packed with antioxidants—specifically catechins, which combat oxidative stress and inflammation. Just 1 tablespoon of matcha provides the same antioxidant power as a cup of green tea.
The adzuki beans themselves contain isoflavones, plant compounds linked to reduced risk of chronic diseases. Together, these ingredients transform your dessert into a health-boosting treat rather than just a sweet indulgence. ✨
Vegan-Friendly Nutrition
This ice cream delivers calcium, iron, and magnesium—nutrients often lacking in vegan diets. The adzuki beans provide 15% of your daily iron needs per serving, while coconut milk contributes 10% of your calcium.
For even better mineral absorption, add a pinch of blackstrap molasses (about ½ teaspoon) to the base—it’s rich in calcium and iron without altering the flavor significantly. The recipe avoids refined sugars and artificial additives, making it a cleaner option for those avoiding processed desserts.
Nutrition facts
Frequently asked questions
Can I make this ice cream without an ice cream maker?
Use the no-churn method: Whip ½ cup coconut cream (chilled) until stiff peaks form, then fold it into your chilled adzuki base. Freeze in an airtight container, stirring with a fork every 30 minutes for 4 hours to break up ice crystals. The texture will be slightly softer but still creamy and delicious.
Why does my adzuki bean base taste bitter?
Overcooking the beans or using old dried adzuki beans can cause bitterness. Always soak beans overnight (8+ hours) and cook them just until thickened (10 minutes max). For extra sweetness, add 1 extra tablespoon of maple syrup or a pinch of vanilla bean paste to balance flavors.
What’s the best way to store leftovers?
Transfer scooped portions to an airtight container with parchment paper between layers to prevent freezer burn. Store for up to 2 weeks—the flavor actually improves as it ages! For best texture, let it sit at room temperature for 5-10 minutes before scooping again.
Can I use red adzuki beans instead of sweet adzuki?
Yes, but expect a slightly earthier taste. Red adzuki beans are firmer and less sweet, so increase the maple syrup to ⅓ cup and add ½ teaspoon of cinnamon to enhance flavor. The texture will remain creamy, though the color will be more muted.
How do I fix icy texture in my finished ice cream?
If ice crystals form, don’t worry! Remove the container from the freezer and stir vigorously with a fork for 2-3 minutes. Return to the freezer for 1 more hour. For prevention, always press plastic wrap directly onto the surface before freezing to minimize air exposure.