Side Dishes
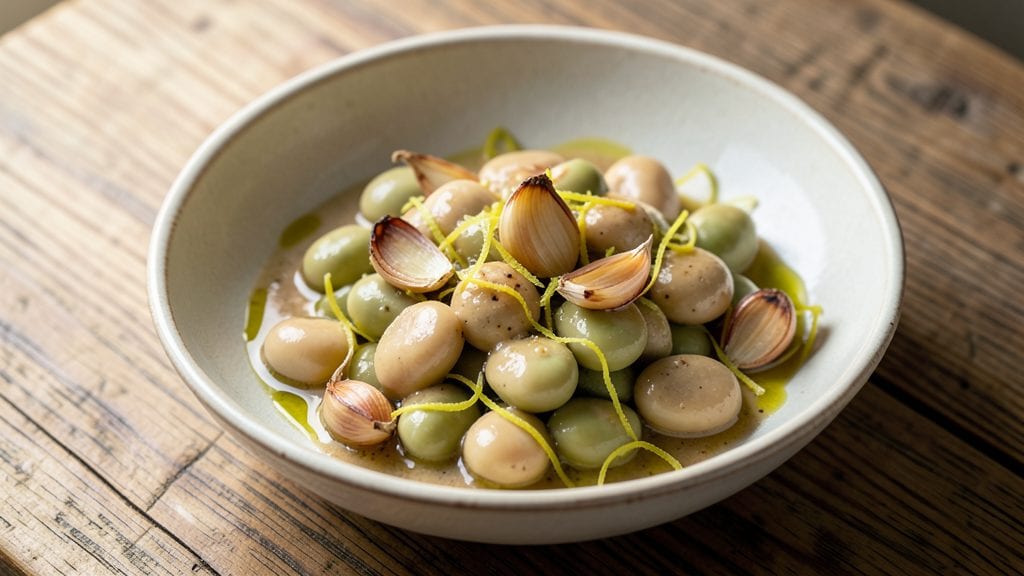
Transforming canned fava beans into this lemon-garlic hummus with a crunchy texture is one of those cooking discoveries that makes you question why you didn’t try it sooner.
The secret lies in blending the beans with tahini and lemon until smooth, then finishing with a touch of olive oil and toasted nuts for that satisfying bite. I first made this version after realizing how versatile canned fava beans are—no soaking, no peeling, just pure convenience without sacrificing flavor.
What sets this hummus apart is the balance of creamy, rich tahini and the bright, zesty kick of lemon, which cuts through the earthiness of the fava beans. The crunch comes from toasted pine nuts or slivered almonds, adding texture that keeps every bite interesting.
This recipe is foolproof and ready in under 15 minutes, making it perfect for last-minute appetizers or a quick snack when you’re craving something fresh and flavorful.
You’ll end up with a hummus that’s smooth yet textured, with a vibrant golden color from the lemon zest and a flavor profile that’s both familiar and exciting. It’s the kind of dish that pairs beautifully with warm pita, crisp vegetables, or even as a spread for grilled sandwiches.
The best part? It keeps well in the fridge for up to 5 days, so you can make a batch and enjoy it all week.
For those who love experimenting, try adding a pinch of smoked paprika or a dash of harissa for extra depth, or swap the nuts for roasted chickpeas for a different kind of crunch.
This hummus is versatile, satisfying, and impossible to resist—once you try it, you’ll want to make it all the time.
Ingredients for canned fava beans
Just eleven ingredients transform canned fava beans into this vibrant, crunchy lemon-garlic hummus.
| Ingredient | Amount | Notes |
|---|---|---|
| Canned Fava Beans 🌱 | 15 oz | Drained and rinsed thoroughly |
| Tahini 🥜 | ½ cup | Sesame paste, unsweetened |
| Extra-Virgin Olive Oil 🫒 | ½ cup | High-quality, fruity variety |
| Fresh Lemon Juice 🍋 | 3 tbsp | Freshly squeezed, strained |
| Lemon Zest 🍋 | 1 tbsp | Fine, from 1 organic lemon |
| Garlic Cloves 🧄 | 3 cloves | Peeled, roasted for depth |
| Pine Nuts 🥜 | ¼ cup | Toasted until golden |
| Slivered Almonds 🌰 | ¼ cup | Toasted for crunch |
| Diamond Crystal Kosher Salt 🧂 | ½ tsp | Fine grain for balance |
| Ground Black Pepper 🌶️ | ¼ tsp | Freshly cracked peppercorns |
| Ice Cold Water 💧 | 2 tbsp | For adjusting consistency |
The fava beans are the star, so grab the highest-quality canned variety you can find—Goya or Woodstock Farms are my go-tos. Look for cans with no added salt (it’s easier to control the seasoning yourself). Tahini is non-negotiable here—Whole Foods or Trader Joe's carry excellent brands, but avoid anything with added sugar or oil. Fresh lemon juice and zest are essential for that bright, zesty punch, so don’t substitute bottled lemon juice (the flavor just isn’t the same). For the garlic, roasting it first adds a sweet, mellow depth that blends beautifully with the fava beans—simply wrap the cloves in foil with a drizzle of olive oil and roast at 400°F for 10 minutes.
No tahini? Substitute with 0.25 cup extra-virgin olive oil plus 0.25 cup tahini-free hummus base—though the texture will be slightly less rich. Running short on pine nuts? Toasted almonds or walnuts work beautifully, though the flavor profile shifts slightly. The slivered almonds can be swapped for toasted chickpeas or even croutons for a different kind of crunch. For extra depth, add a pinch of smoked paprika or harissa—just be mindful of the heat level. If your hummus turns out too thick, add ice water one tablespoon at a time until you reach the perfect spreadable consistency (it should coat the back of a spoon but still hold shape).
This hummus keeps beautifully in an airtight container in the fridge for up to 5 days, though I always make extra because it disappears so quickly. For the best texture, let it sit at room temperature for 10 minutes before serving—this allows the flavors to meld and the crunch to develop fully. If you’re prepping ahead, store the toasted nuts separately and mix them in just before serving to maintain that satisfying crunch. Freezes well for up to 3 months, though the texture may soften slightly upon thawing.
Why You'll Love This Recipe
- Five-Ingredient Magic: I swear by this recipe—three of those ingredients are pantry staples (tahini, olive oil, lemon), and the fava beans? Just open the can. No peeling, no waiting, no fuss. Honestly, it’s the kind of dish that makes me feel like I’m cooking fancy when I’m really just stirring a pot while scrolling through my phone.
- Bright, Nutty Bliss: That tahini-creaminess with the zesty lemon? It’s like a hug in your mouth. The lemon zest gives it this bright, almost floral finish—like someone sprinkled sunshine over everything. I’ll be real: I’ve made it for guests who asked, “What’s in it?” and they immediately asked for the recipe.
- Lunch or Snack, Anytime: This is my go-to for quick lunches, but it’s also the star of my charcuterie board or a lazy Sunday brunch. Serve it warm with crusty bread, or let it cool and pack it for work—it keeps well for days. Between us, I’ve even drizzled it over grilled chicken or tossed it into salads when I’m feeling fancy.
- Budget-Friendly Pantry Hero: Canned fava beans are a steal, and tahini lasts forever. A single jar of tahini stretches across multiple meals, and the olive oil and lemon? You already have them. I’ve made this for under $5 per serving, and it still feels like a special treat—not some sad, budget-stretched meal. Plus, leftovers? They’re my secret weapon for busy mornings.
Step-by-step instructions for lemon-garlic hummus with crunchy texture
This vibrant hummus delivers bright citrus notes and nutty crunch—every step ensures perfect texture and flavor balance.
Roast the Garlic for Depth of Flavor
Preheat your oven to 400°F. Wrap the 3 cloves garlic cloves tightly in a small piece of aluminum foil. Roast for 10-12 minutes until the cloves are soft and caramelized with golden edges. This roasting process creates a sweet, mellow garlic flavor that won't overpower the dish.
Let the roasted garlic cool for 5 minutes before squeezing the cloves directly into your food processor. The residual heat makes them easier to extract, and the cooled texture prevents the processor from overheating. You'll notice the aroma intensify as they cool—this is your signal they're ready to use.
Toast the Nuts for Maximum Crunch
While the garlic roasts, spread the 0.25 cup pine nuts and 0.25 cup slivered almonds on a dry baking sheet in an even layer. Toast in the same 400°F oven for 5-7 minutes, stirring once halfway through, until they're fragrant and just beginning to turn golden. Watch carefully—they burn quickly, and you want them to be crunchy but not bitter.
Transfer the toasted nuts to a small bowl and let them cool completely. This cooling step is crucial—it prevents the nuts from releasing their oils into the hummus, which would make it greasy. The contrast between the warm hummus and cool nuts will create that perfect textural experience when you serve it.
Blend the Base Ingredients
Drain and rinse the 15 oz canned fava beans thoroughly under cold water to remove any residual canning liquid. Transfer them to your food processor along with the roasted garlic, 0.5 cup tahini, 0.5 cup extra-virgin olive oil, 3 tbsp fresh lemon juice, 1 tbsp lemon zest, 0.5 tsp diamond crystal kosher salt, and 0.25 tsp ground black pepper.
Blend on high speed for 3-4 minutes until the mixture is completely smooth and creamy. You'll see the tahini emulsify with the olive oil, creating a thick, velvety base. If the mixture seems too thick, add 1 tablespoon ice cold water at a time until it reaches a spreadable consistency—this ensures the hummus stays smooth without becoming watery.
Fold in the Crunchy Elements
With the processor running on low speed, gradually add the toasted nuts in batches. This slow incorporation prevents the nuts from breaking down and losing their crunch. Once fully combined, taste and adjust the seasoning—you may need a touch more lemon juice or salt to balance the flavors.
Transfer the hummus to a serving bowl and press a thin layer of the remaining hummus on top to create a glossy finish. This presentation step not only looks beautiful but also helps the hummus hold its shape when you garnish. Serve immediately with warm pita bread or fresh vegetables for the best experience.
Pro Tips For Making Canned Fava Beans
- Drain and Rinse: Open that can of fava beans and give them a thorough rinse under cold water—even if the label says "ready to eat." The brine clings to the beans like glue, and if you skip this, your tahini sauce will taste more like a salty broth than a bright, creamy dip. I learned this the hard way when my first batch turned out blander than a sad office salad.
- Whisk the Tahini: Tahini loves to separate like a stubborn teenager. Before mixing it into your sauce, whisk it vigorously with a splash of warm water (about 2 tablespoons) until it’s smooth as silk. This isn’t just about texture—it keeps the sauce from turning grainy when you add the lemon juice later. (Yes, even if you’re impatient like me.)
- Zest First, Juice Last: Add the lemon zest to the tahini mixture before the juice. This way, the zest infuses the tahini properly instead of just floating on top like confetti at a party. Once everything’s emulsified, stir in the juice—this keeps the sauce cohesive and prevents it from curdling like a science experiment gone wrong.
- Finish with Oil: Drizzle the extra-virgin olive oil in at the very end, right before serving. This locks in the flavors and gives that final luxurious sheen. Skimping here or adding it too early means the oil just sits on top, looking pretty but not doing its job. A good glug (about 1-2 tablespoons) makes all the difference—trust the process.
Best sauces and condiments for this recipe
Lemon-Tahini Sauce
This hummus already has a vibrant lemon-tahini base, but you can elevate it further by drizzling a homemade lemon-tahini sauce on top. Mix 2 tbsp tahini, 1 tbsp fresh lemon juice, 1 tsp honey, and 1 tsp olive oil until smooth.
The sauce adds a glossy finish and extra brightness that pairs perfectly with the crunchy texture. 💛
Harissa or Chili Oil
For a spicy kick, drizzle 1-2 teaspoons of harissa paste or chili oil over the hummus before serving. Harissa adds a smoky, spicy depth, while chili oil brings a fiery, aromatic punch.
Start with ½ teaspoon and adjust to taste—this works especially well if you're serving with warm pita or grilled vegetables. 🌶️
Olive Oil Infusions
Swap the plain olive oil for infused olive oil to add extra flavor layers. Try infusing ½ cup olive oil with 1 tsp smoked paprika, 1 tsp dried oregano, or 2 crushed garlic cloves for 10 minutes at low heat.
The infused oil adds complexity that complements the lemon and fava beans beautifully. Use it in place of the regular olive oil in the recipe.
Fresh Herb Garnishes
Brighten the hummus with fresh herbs like cilantro, parsley, or mint. Chop 2 tbsp fresh herbs and sprinkle them over the top just before serving. The freshness cuts through the richness of the tahini and adds a pop of color.
For an extra touch, lightly toast the herbs in a dry pan for 30 seconds to enhance their aroma. ✨
Yogurt or Labneh Swirl
Add a dollop of Greek yogurt or labneh (strained yogurt) and swirl it into the hummus for a creamy contrast. The tanginess balances the earthy fava beans and adds a cooling element.
Use about 2 tbsp and mix it in gently to maintain the hummus’s texture. This works especially well if you're serving it as a dip with crudités.
Smoked Paprika Dust
Finish the hummus with a light dusting of smoked paprika for a subtle smoky aroma. Use a fine-mesh sieve to sprinkle ½ teaspoon over the top just before serving. The paprika adds warmth and a beautiful golden hue that makes the dish look even more inviting.
This is a simple but effective way to add depth without overpowering the lemon and garlic flavors.
Nutrition facts
Frequently asked questions
Why do canned fava beans need rinsing before using?
Rinsing removes excess sodium and preserves the natural flavor of the beans. Canned fava beans often contain brining liquid that can make your hummus taste overly salty. A quick rinse under cold water ensures you get the clean, bright taste of the beans without any metallic aftertaste.
Can I substitute fresh fava beans for canned in this recipe?
Yes, but you'll need to soak and peel them first. Fresh fava beans require 12-24 hours of soaking to soften, then peeling each bean individually (which is time-consuming). For this recipe, canned beans save prep time while delivering consistent texture. If using fresh, reduce the total amount by 20% since they're denser.
What's the best way to store leftover hummus?
Keep it in an airtight container in the fridge for up to 5 days. For maximum crunch, store the toasted nuts separately and mix them in just before serving. If freezing, place plastic wrap directly on the hummus surface to prevent freezer burn. Thaw overnight in the fridge for best texture.
Can I make this hummus without tahini?
You can substitute with 0.25 cup extra olive oil plus 0.25 cup hummus base (like chickpea hummus), but the flavor will be less rich. For a tahini-free version, add 1 tsp miso paste or 1 tbsp nutritional yeast to compensate for the missing umami depth. The texture will be slightly lighter but still delicious.
How do I fix hummus that's too thick or too thin?
For thick hummus, add ice cold water 1 tbsp at a time while blending. If too thin, blend for 1-2 extra minutes to emulsify the oils. Never add more tahini—it will make the hummus greasy. The perfect consistency coats the back of a spoon but holds shape when spread.