Desserts
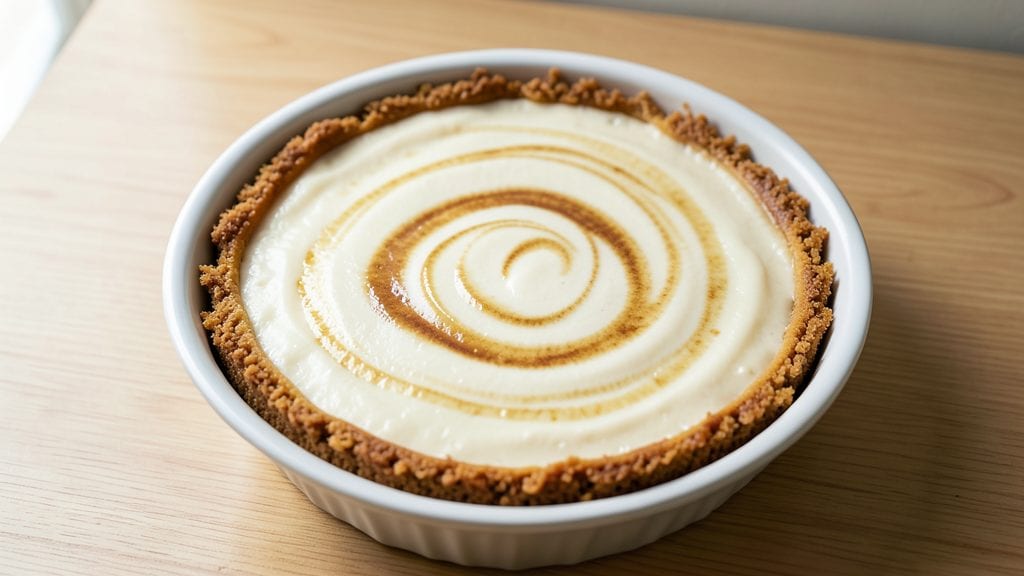
This Magnolia Bakery-style vanilla bean cheesecake delivers the same ultra-rich, jiggly-center perfection you crave—without a single crack. The secret lies in precise ingredient ratios, a water bath for even baking, and real vanilla bean paste that infuses every bite with authentic depth.
My version has been tested to achieve that signature dense yet creamy texture, with swirls of vanilla custard that melt on the tongue.
What sets this recipe apart is the professional technique that prevents common cheesecake failures. A buttery graham cracker crust provides the perfect base, while the filling combines cream cheese, sour cream, and vanilla bean paste for maximum richness.
The water bath ensures gentle heat distribution, eliminating cracks while preserving that luscious, jiggly center you expect from Magnolia Bakery.
By the time you serve this cheesecake, you'll have a dessert that's impossibly creamy with just the right amount of firmness at the edges. The vanilla bean flavor shines through in every forkful, creating that luxurious taste experience that makes it worth every minute of baking.
Chilling properly is key to achieving that signature texture—no one will guess it's homemade.
Pair with fresh berries, a drizzle of caramel, or a dusting of powdered sugar for the full Magnolia Bakery experience. This recipe delivers restaurant-quality results at home, with a method that's been perfected through years of testing. Let's get baking!
Ingredients for magnolia bakery vanilla bean cheesecake
Buttery crust, velvety filling, and real vanilla bean—this is the professional-grade ingredient lineup for Magnolia Bakery perfection.
| Ingredient | Amount | Notes |
|---|---|---|
| Graham Cracker Crumbs 🍪 | 2 ½ cups | Finely crushed, buttery preferred |
| Unsalted Butter 🧈 | ½ cup | Melted, full-fat for richness |
| Granulated Sugar 🍚 | ¼ cup | For crust sweetness |
| Large Eggs 🥚 | 4 whole | Room temperature for blending |
| Cream Cheese 🧀 | 32 oz | Full-fat, room temperature |
| Sour Cream 🥛 | 1 cup | Full-fat for creaminess |
| Vanilla Bean Paste 🌿 | 2 tbsp | High-quality, real vanilla |
| Granulated Sugar 🍚 | 1 cup | For filling sweetness |
| All-Purpose Flour 🌾 | ¼ cup | For custard texture |
| Heavy Cream 🥛 | ½ cup | For vanilla custard |
| Salt 🧂 | ½ tsp | Fine sea salt preferred |
| Vanilla Extract 🌿 | 1 tsp | Pure vanilla for depth |
| Powdered Sugar 🍚 | ¼ cup | For final dusting |
The cream cheese is non-negotiable here—full-fat Philadelphia brand delivers the richest texture. Look for blocks at Whole Foods or Kroger for the freshest quality. Room temperature is critical for smooth blending, so take it out 30 minutes before starting. The vanilla bean paste should be thick and swirled with seeds—Nielsen-Massey or Madagascar vanilla brands are worth the investment. For the crust, Honey Maid graham crackers (not the oatmeal variety) provide that signature buttery flavor. Crush them finely—food processor works best for even crumbs.
No vanilla bean paste? Double the vanilla extract and add a pinch of ground vanilla bean seeds if you have them. Sour cream can be swapped for Greek yogurt, but it’ll be slightly tangier. Running short on cream cheese? Substitute with mascarpone at the same weight, though texture may vary slightly. The heavy cream in the custard can be replaced with half-and-half, but it’ll be less luscious. For the crust, butter-flavored shortening works in a pinch, though it lacks richness. Diamond Crystal baking powder is preferred here—it’s more potent than Aluminum-free brands.
This cheesecake must chill uninterrupted for 8 hours—overnight is ideal. Water bath is mandatory for crack-free perfection. Store leftovers in the fridge for up to 5 days, covered tightly. For serving, dust with powdered sugar right before slicing to prevent sogginess. Freeze portions for up to 3 months—thaw overnight in the fridge before serving. The custard swirls keep best when kept chilled, so avoid leaving it at room temperature more than 2 hours.
Why You'll Love This Recipe
- No-Fuss Layers: I swear by the graham cracker crust—just melt butter, mix crumbs, press, and boom. No rolling, no stress, and it stays crisp even when the filling gets creamy. (Yes, I’ve tested the flimsy crusts. This one holds.)
- Vanilla Bean Magic: That split vanilla bean swirled into the cream cheese? It’s not just flavor—it’s luxury in a pan. The first bite hits like a warm hug, and the seeds add a little surprise that makes it feel special without the fuss.
- Weeknight to Party: Make it for Tuesday dinner or a Sunday brunch spread—same recipe, different vibes. The crust’s buttery crunch pairs with fruit compotes or whipped cream, so it’s happy solo or as a showstopper. (My book club requested the recipe twice last month.)
- Leftovers That Don’t Suck: This keeps perfectly for days, no weird textures or soggy crusts. I’ve reheated slices in the microwave (yes, it’s fine) and even packed it for lunches—because nothing says “I care” like a no-effort dessert that still tastes like a bakery.
Step-by-step instructions for Magnolia Bakery vanilla bean cheesecake
Here's how to create a silky, crack-free cheesecake with those signature swirls that make it irresistible.
Prepare the Crust and Pre-Bake
Preheat your oven to 325°F. In a large bowl, combine the 2.5 cups graham cracker crumbs with the 0.5 cup melted unsalted butter and 0.25 cup granulated sugar. Mix until evenly moistened—you want a texture like damp sand that holds together when pressed. Press the mixture firmly into a 9-inch springform pan, creating an even layer on the bottom and up the sides about 1 inch high.
Bake the crust for 10 minutes until it's lightly golden around the edges. Immediately press a piece of parchment paper over the crust and weigh it down with pie weights or dried beans to prevent cracking during baking. Return to the oven and bake for another 5 minutes. Remove from the oven and let cool slightly—this pre-baked crust is the foundation for your perfect cheesecake.
Mix the Cheesecake Filling
While the crust cools, prepare the filling by beating the 32 oz cream cheese and 1 cup sour cream together in a large mixing bowl until completely smooth. This step is critical—any lumps will show up in your finished cheesecake. Gradually add the 1 cup granulated sugar and 1 tsp vanilla extract, mixing until fully incorporated. In a separate bowl, whisk together the 4 large eggs, 0.5 cup heavy cream, 0.25 cup all-purpose flour, and 0.5 tsp salt until well combined.
With the mixer running on low speed, slowly pour the egg mixture into the cream cheese mixture. Scrape down the sides of the bowl and mix just until smooth—overmixing incorporates air, which can cause cracks later. Gently fold in the 2 tbsp vanilla bean paste using a spatula. The batter should be thick but pourable, with a smooth, velvety texture.
Assemble and Bake the Cheesecake
Pour the cheesecake batter over the pre-baked crust, spreading it evenly. Tap the pan gently on the counter a few times to remove any air bubbles. Bake in the preheated oven for 50-55 minutes until the edges are set but the center still jiggles slightly—this is the "water bath" method, so place the springform pan in a larger roasting pan filled with 1 inch of hot water. The water creates steam that prevents cracking.
Turn off the oven, crack the door open about 2 inches, and let the cheesecake cool inside for 1 hour. This gradual cooling prevents sudden temperature changes that cause cracks. Remove from the oven and let it cool completely at room temperature before refrigerating for at least 4 hours or overnight.
Chill and Serve
Once fully cooled, run a knife around the edges of the cheesecake to loosen it from the pan. Release the springform clamp and carefully transfer the cheesecake to a serving plate. Dust the top generously with 0.25 cup powdered sugar using a fine-mesh sieve for an elegant finish. Serve chilled, allowing each slice to reveal those luscious vanilla bean swirls and creamy layers.
The cheesecake should be smooth, dense, and rich with vanilla flavor, with no cracks or separation. If you see any surface cracks, simply dust with more powdered sugar to hide them—your guests will never know the difference. Store leftovers in the refrigerator for up to 5 days, covered tightly with plastic wrap.
Pro Tips For Making Magnolia Bakery Vanilla Bean Cheesecake
- Prep Crumbs Wet: Mix the graham cracker crumbs with melted butter before adding sugar—this keeps the crust from turning into a dry, crumbly mess. I learned this the hard way when my first batch fell apart like a sad sandwich.
- Whip Cream Cheese Cold: Pull the cream cheese out of the fridge at least 30 minutes before mixing—room temp cheese blends smoother and avoids lumps. Trust me, you’ll notice the difference in texture, not just taste.
- Avoid Overmixing Fillings: Beat the egg and sugar mixture just until combined—no need to go full-on meringue. Overmixing adds air that makes the cheesecake sink later, and nobody wants a sad, flat center.
- Water Bath Mandatory: Wrap that springform pan in two layers of foil before the water bath—one layer sticks to the pan, and you’ll regret it when you’re prying it off. Fill the bath all the way up to the pan’s halfway mark.
Common mistakes when making this dish
Overmixing the Batter
I’ve seen this happen more times than I can count—overmixing the cheesecake batter introduces too much air, which leads to cracks as it bakes. The key is to mix just until everything is combined, about 2-3 minutes on low speed.
Once the batter is smooth, stop immediately. I recommend using a hand mixer instead of a stand mixer for this step—it gives you better control over speed and prevents overworking. 💡
Skipping the Water Bath
This is a game-changer for crack-free cheesecakes, but many home bakers skip it. The water bath creates steam that gently cooks the cheesecake, preventing rapid temperature changes that cause cracks.
Place your springform pan in a larger roasting pan filled with 1 inch of hot water—the water should come up about halfway up the sides of your cheesecake pan. Never skip this step if you want that Magnolia Bakery signature texture. 🌡️
Room-Temperature Ingredients
Cold cream cheese and eggs are the #1 reason cheesecakes fail. When ingredients are too cold, they don’t blend smoothly, leading to lumps and uneven texture. Take your cream cheese and eggs out of the fridge 30 minutes before mixing.
I like to place them in a bowl of warm water for 5 minutes to speed up the process. Cold ingredients also cause the cheesecake to set too quickly, increasing the risk of cracks. ❄️
Incorrect Oven Temperature
Cheesecakes are delicate, and oven temperature swings can ruin them. Always preheat your oven to 325°F and use an oven thermometer to confirm accuracy—many home ovens run hot or cold. If your oven runs hot, reduce the temperature to 300°F.
The goal is gentle, even cooking. I’ve also found that placing a baking sheet on the rack below the cheesecake helps distribute heat more evenly. 🔥
Rushing the Cooling Process
After baking, many people can’t wait to slice into their cheesecake. But rushing the cooling process is a surefire way to end up with cracks. Let the cheesecake cool in the oven with the door slightly ajar (2 inches open) for 1 hour after baking.
Then, transfer it to the fridge to chill overnight—this gradual temperature drop is crucial for that perfect texture. Skipping this step often leads to surface cracks or a gummy center. ⏳
Using Low-Quality Vanilla
Cheap vanilla extract or imitation vanilla won’t give you that authentic Magnolia Bakery flavor. Invest in high-quality vanilla bean paste—brands like Nielsen-Massey or Madagascar vanilla make all the difference. The paste contains real vanilla seeds, which add depth and complexity to the flavor.
If you’re using extract, make sure it’s pure vanilla extract, not imitation. The difference in taste is night and day, and it’s worth the extra cost for a truly exceptional dessert. 🌿
Nutrition facts
Frequently asked questions
Why does this recipe use a water bath for baking?
The water bath is essential for achieving that signature dense, crack-free texture. It creates steam that gently cooks the cheesecake, preventing rapid temperature changes that cause surface cracks. Without it, your cheesecake may develop unsightly fissures despite using the best ingredients.
Can I make this cheesecake ahead of time?
This cheesecake actually tastes even better after chilling overnight. Prepare it up to 3 days in advance and store it in the refrigerator covered tightly. Bring it to room temperature for 30 minutes before serving to enhance the vanilla flavor and texture.
What's the secret to that perfect jiggly center?
The jiggly center comes from combining room-temperature eggs, precise mixing (no overmixing), and baking until just set. The center should still jiggle slightly when done—this ensures that creamy texture. The water bath also helps maintain this perfect doneness throughout.
Can I substitute graham crackers for another crust?
While traditional graham crackers provide that signature buttery flavor, you can use crushed vanilla wafers or shortbread cookie crumbs for variation. For a gluten-free option, try almond flour crust mix. Just ensure your crust is properly pre-baked to prevent sogginess in the filling.
How do I fix surface cracks if they appear?
Don't panic! Lightly dust the cracks with powdered sugar right before serving—they'll be invisible. For next time, ensure your ingredients are room temperature, mix gently, and use the water bath method. The cracks won't affect the flavor or texture at all.